Making a smoker for beekeeping
About Smokers
The main purpose of a smoker is to produce smoke, which is used to calm bees. Smoke is necessary during beekeeping to prevent bees from becoming aggressive when inspecting their hives. Smoking the bees helps mask the alarm pheromones within the hive, reducing the likelihood of getting stung. When bees sense smoke, they instinctively gorge themselves on honey, preparing for a possible fire and making it harder for them to bend and sting the beekeeper. Therefore, using a smoker helps minimize harmful encounters between bees and the beekeeper.
Over the years, significant advancements in bee breeding have resulted in more docile bees that are generally less likely to become aggressive. It’s challenging to determine whether bees are aware that beekeepers provide them with food and help control diseases in exchange for honey, as language barriers make gathering this information difficult. However, when dealing with more aggressive bee colonies, having a smoker on hand for protection is beneficial.
The working principle of a smoker is relatively simple. A small fire is created in a chamber, and air is pumped into it using a bellows, producing smoke that exits through a nozzle.
Therefore, a smoker consists of a chamber, a lid with a smoke conduit, and a bellows.
Items Required for Making a Smoker
To create a basic smoker, you will need:
- Two small boards of roughly equal size and thickness for the bellows.
- A spring to keep the bellows extended. An old whisk can be suitable for the purpose.
- Metal hinges to attach the bellows boards to each other.
- Four small screws to fasten the hinges (or more, depending on the chosen hinges).
- Leather for the bellows.
- Small wooden strips to secure the leather to the bellows boards.
- Small nails for attaching the strips.
- A metal container for the smoker’s body. A slightly thicker metal can, such as a tin can, is suitable. Avoid containers that held hazardous substances.
- A metal lid for the smoker’s container. The lid should fit securely and not fall off when the smoker is tilted.
- A smoke conduit attached to the lid. An old plumbing fitting can be suitable.
- A smaller metal can placed inside the smoker container, serving as the base for the fire.
- Two bolts and four nuts to secure the bellows and smoker container together. You may use washers if needed.
Tools generally needed:
- Drill
- Metal drill bit
- Wood drill bit
- Screwdriver
- Scissors for cutting leather
- Marker
- Staple gun
- Staples for the staple gun
- Tin snips
- Gloves when cutting metal to avoid injury
Depending on the size of the smoker and the materials used, the list of required tools and the sizes of drills, for example, may vary. Proceed as you see fit, and if something goes wrong, you’ll learn from it for the next time.
Making the bellows
First, let’s start with making the bellows.
-
Take the boards and connect them with metal hinges, leaving a small gap between the boards.
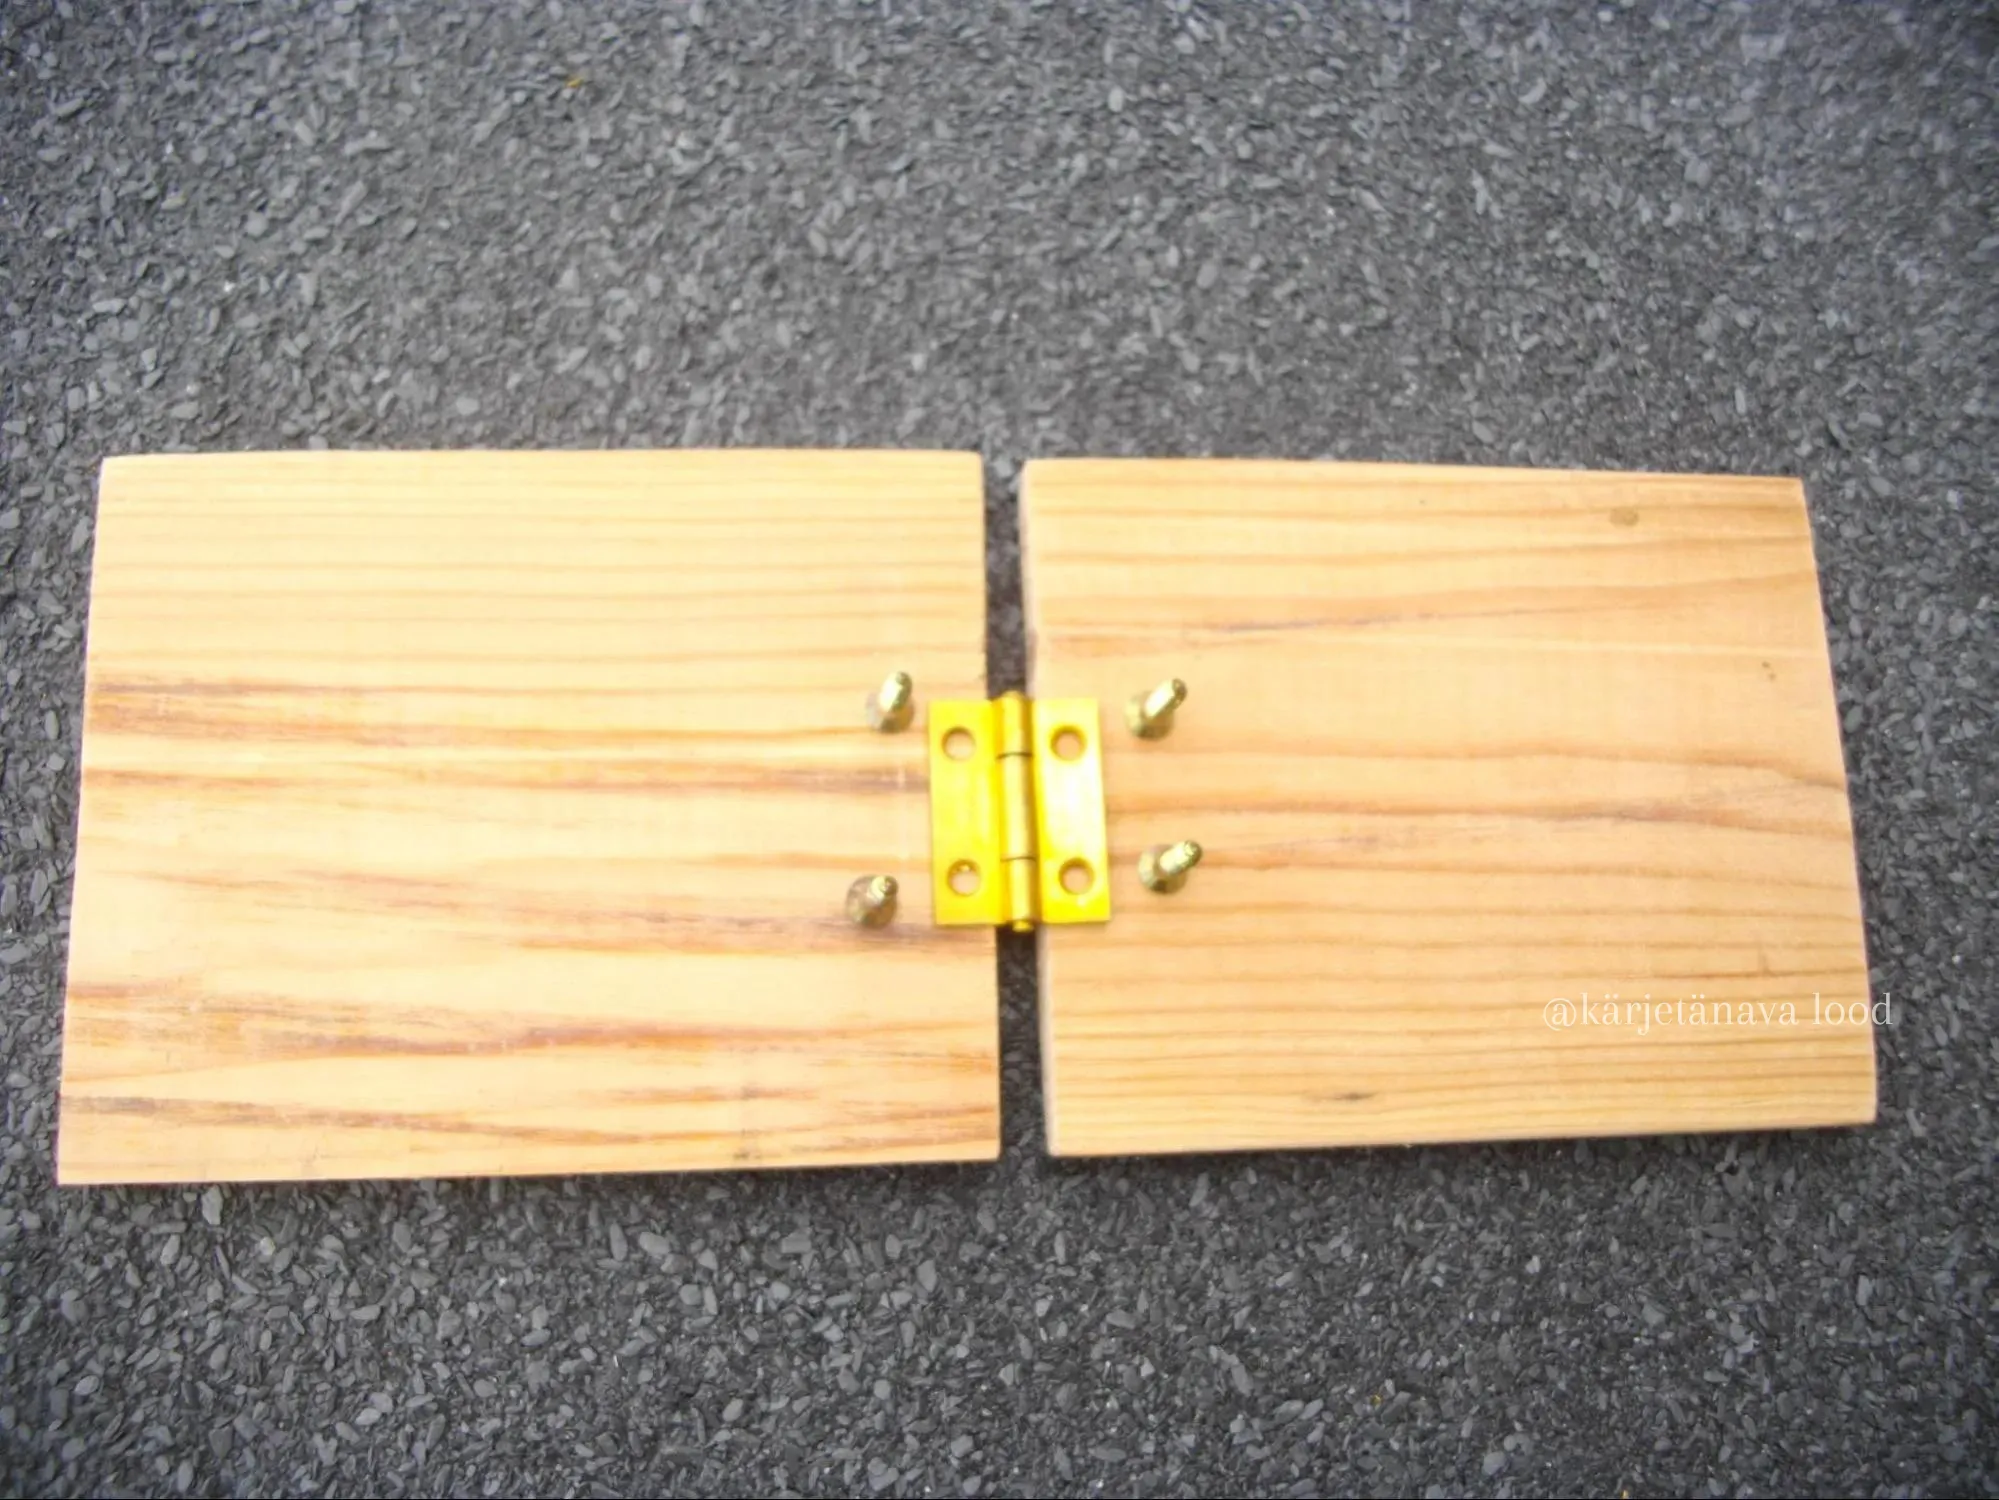
Connecting the smoker's bellows boards Author: apicrap 03.06.2023 - Next, drill a hole in one board for air to flow from the bellows into the chamber.
-
Drill two more holes above this air hole for the mounting bolts that will secure the bellows to the chamber. Later, you'll need to create similar holes in the smoker's body and ensure alignment with the holes in the bellows.
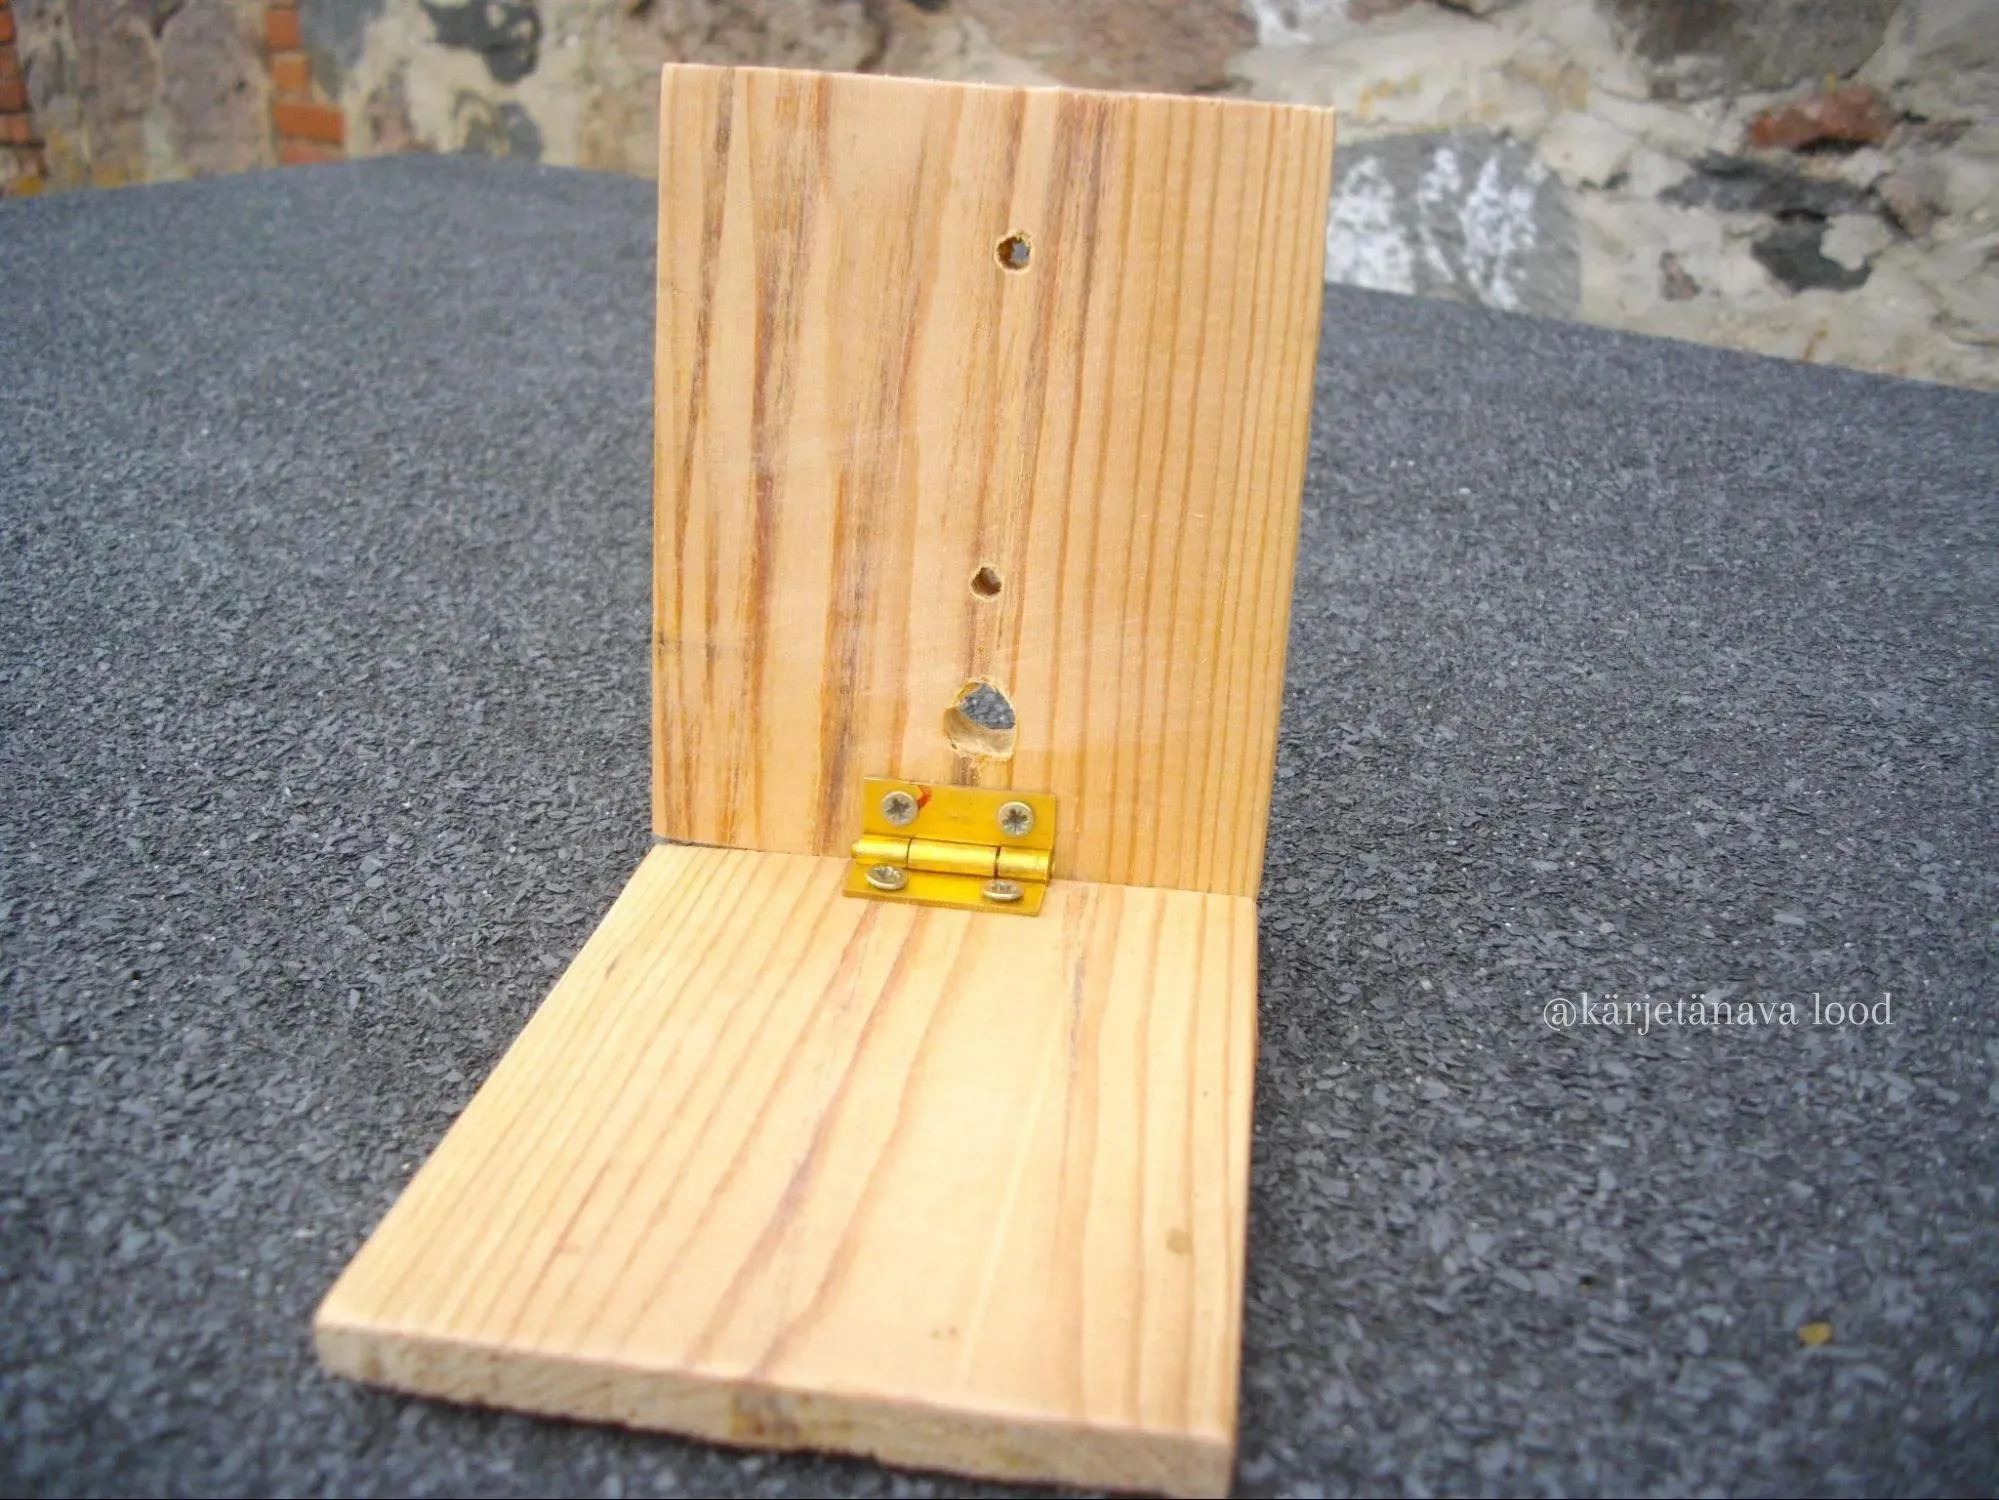
Air hole and bolt holes in the smoker's bellows boards Author: apicrap 03.06.2023 -
Attach the spring between the bellows boards using a staple gun.
The spring should be strong enough to fully extend the bellows after compression. I used an old whisk spring, which worked well for the smaller bellows.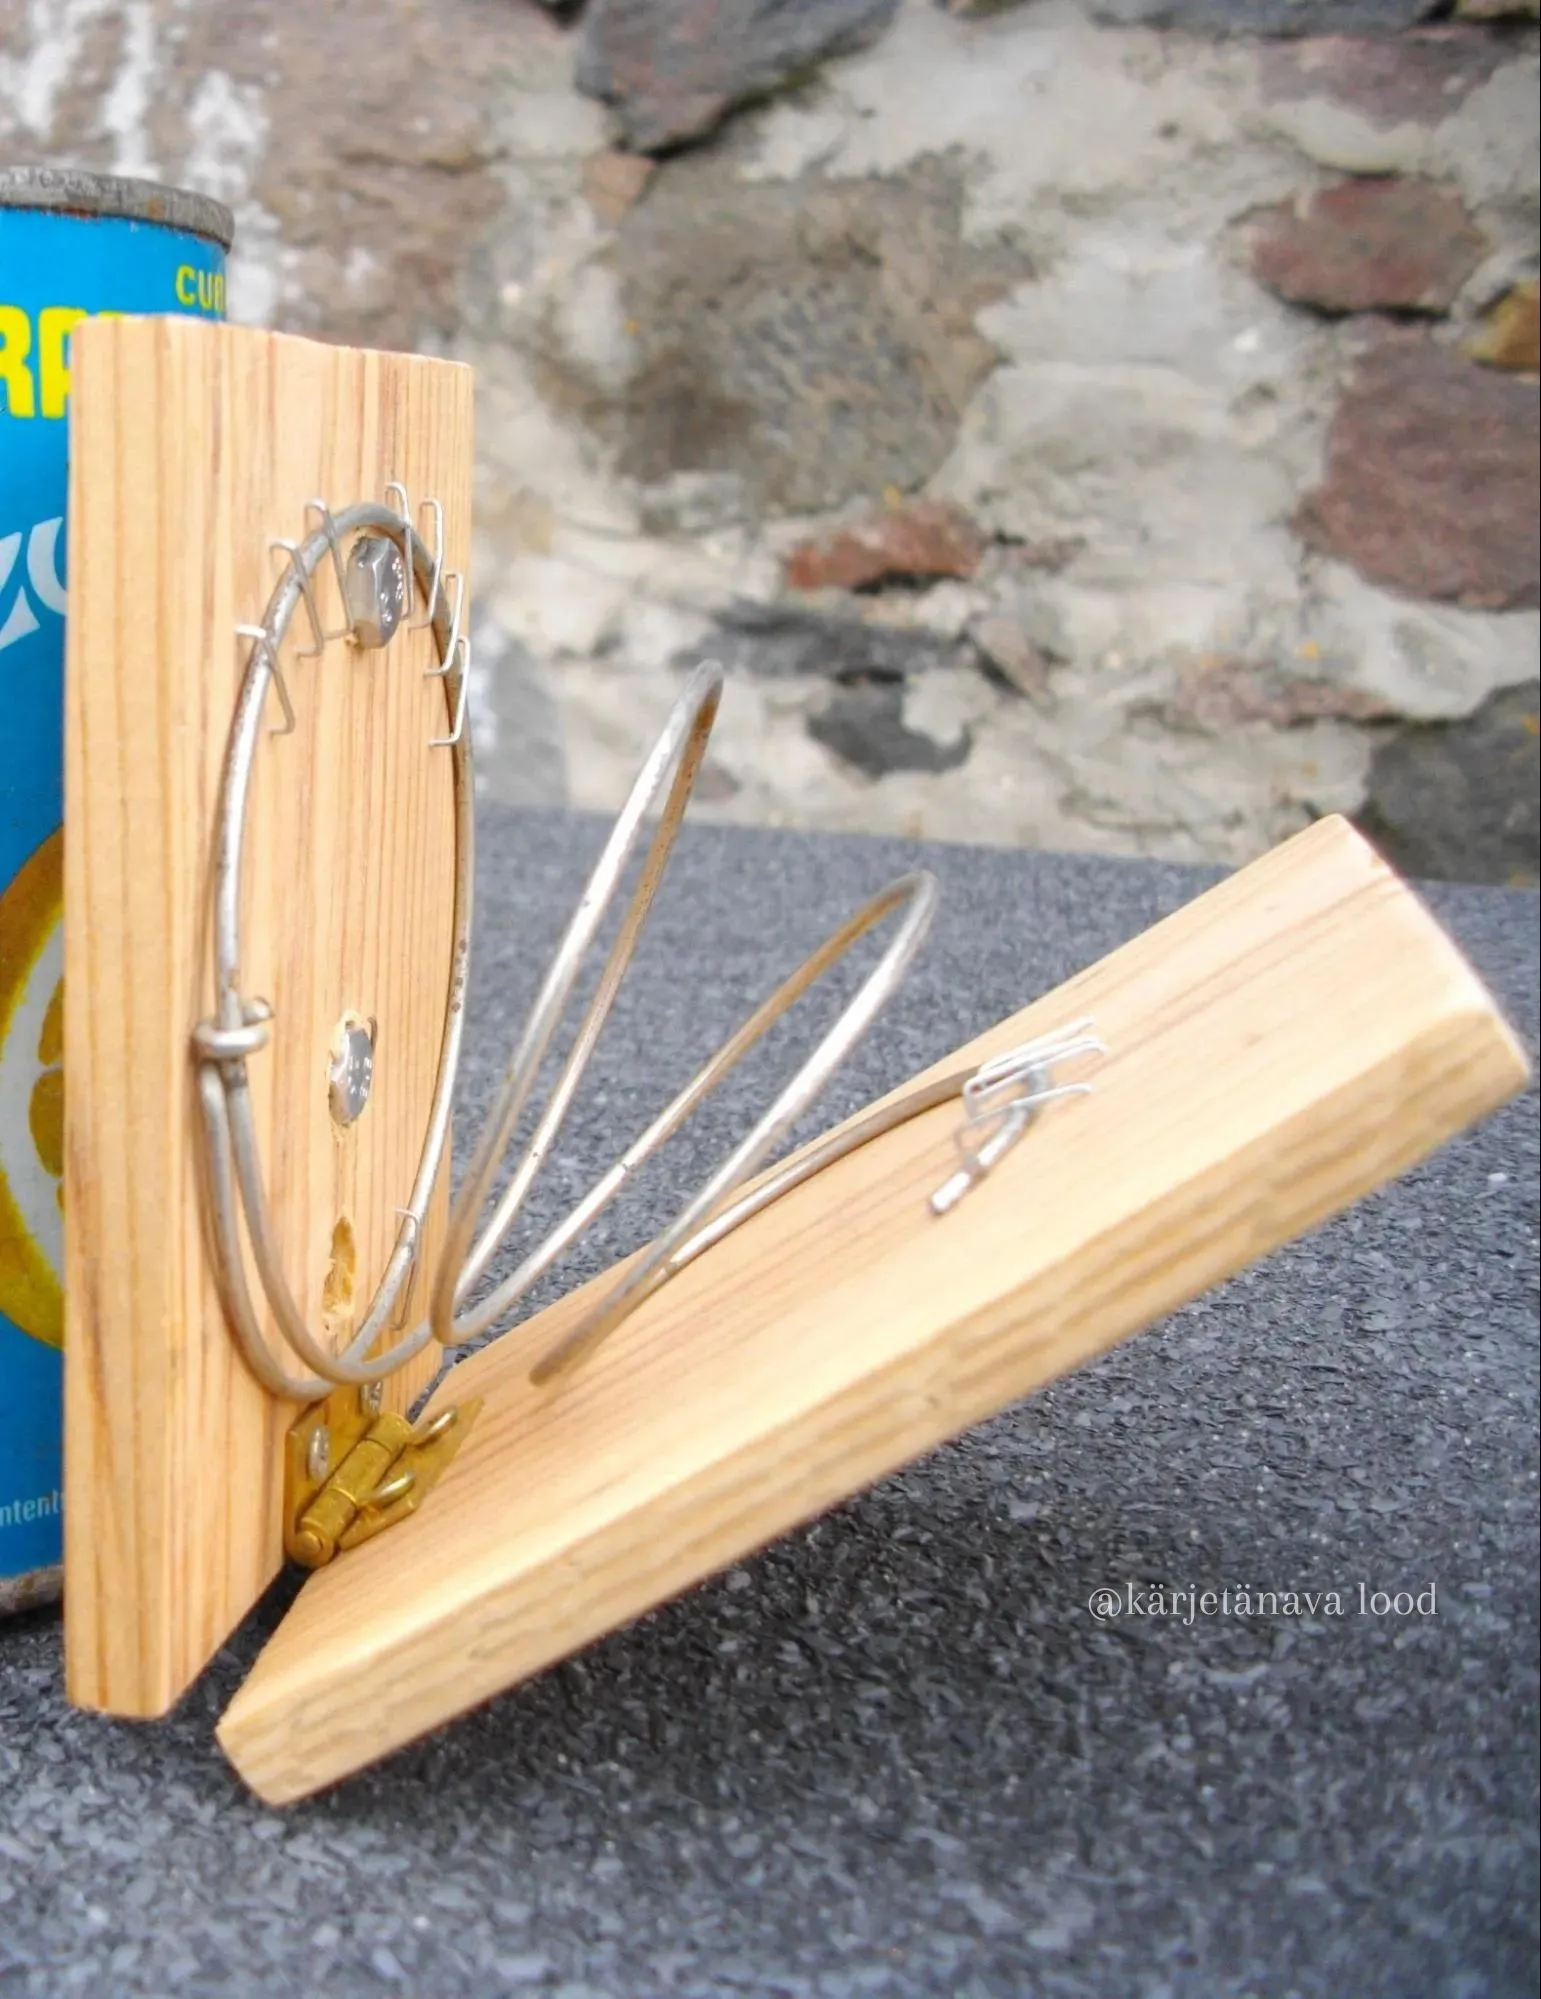
Spring for the smoker's bellows Author: apicrap 03.06.2023 - Attach the mounting bolts to the bellows boards with their ends facing outward. Secure the bolts from the outside with nuts.
- To allow air from the bellows to blow into the smoker, attach leather to the bellows boards. If necessary, you can use a non-permeable and heat-resistant fabric instead of leather. Measure the leather by placing the bellows boards with the attached spring on the leather, open side down and hinge side up. Use a marker to trace the contours of the bellows on the leather. The traced area will become the top of the bellows. Without lifting the bellows from the leather, turn the bellows boards sideways and trace their contours on the leather - this will form one side of the bellows. Then, turn the bellows upright and trace the contours - this will form the bottom of the bellows. Place the bellows boards back on the first traced contour and repeat the tracing from the center to the other side. The result should resemble the shape shown in the picture below. The bottom should overlap.
-
Cut the bellows from the leather using scissors.
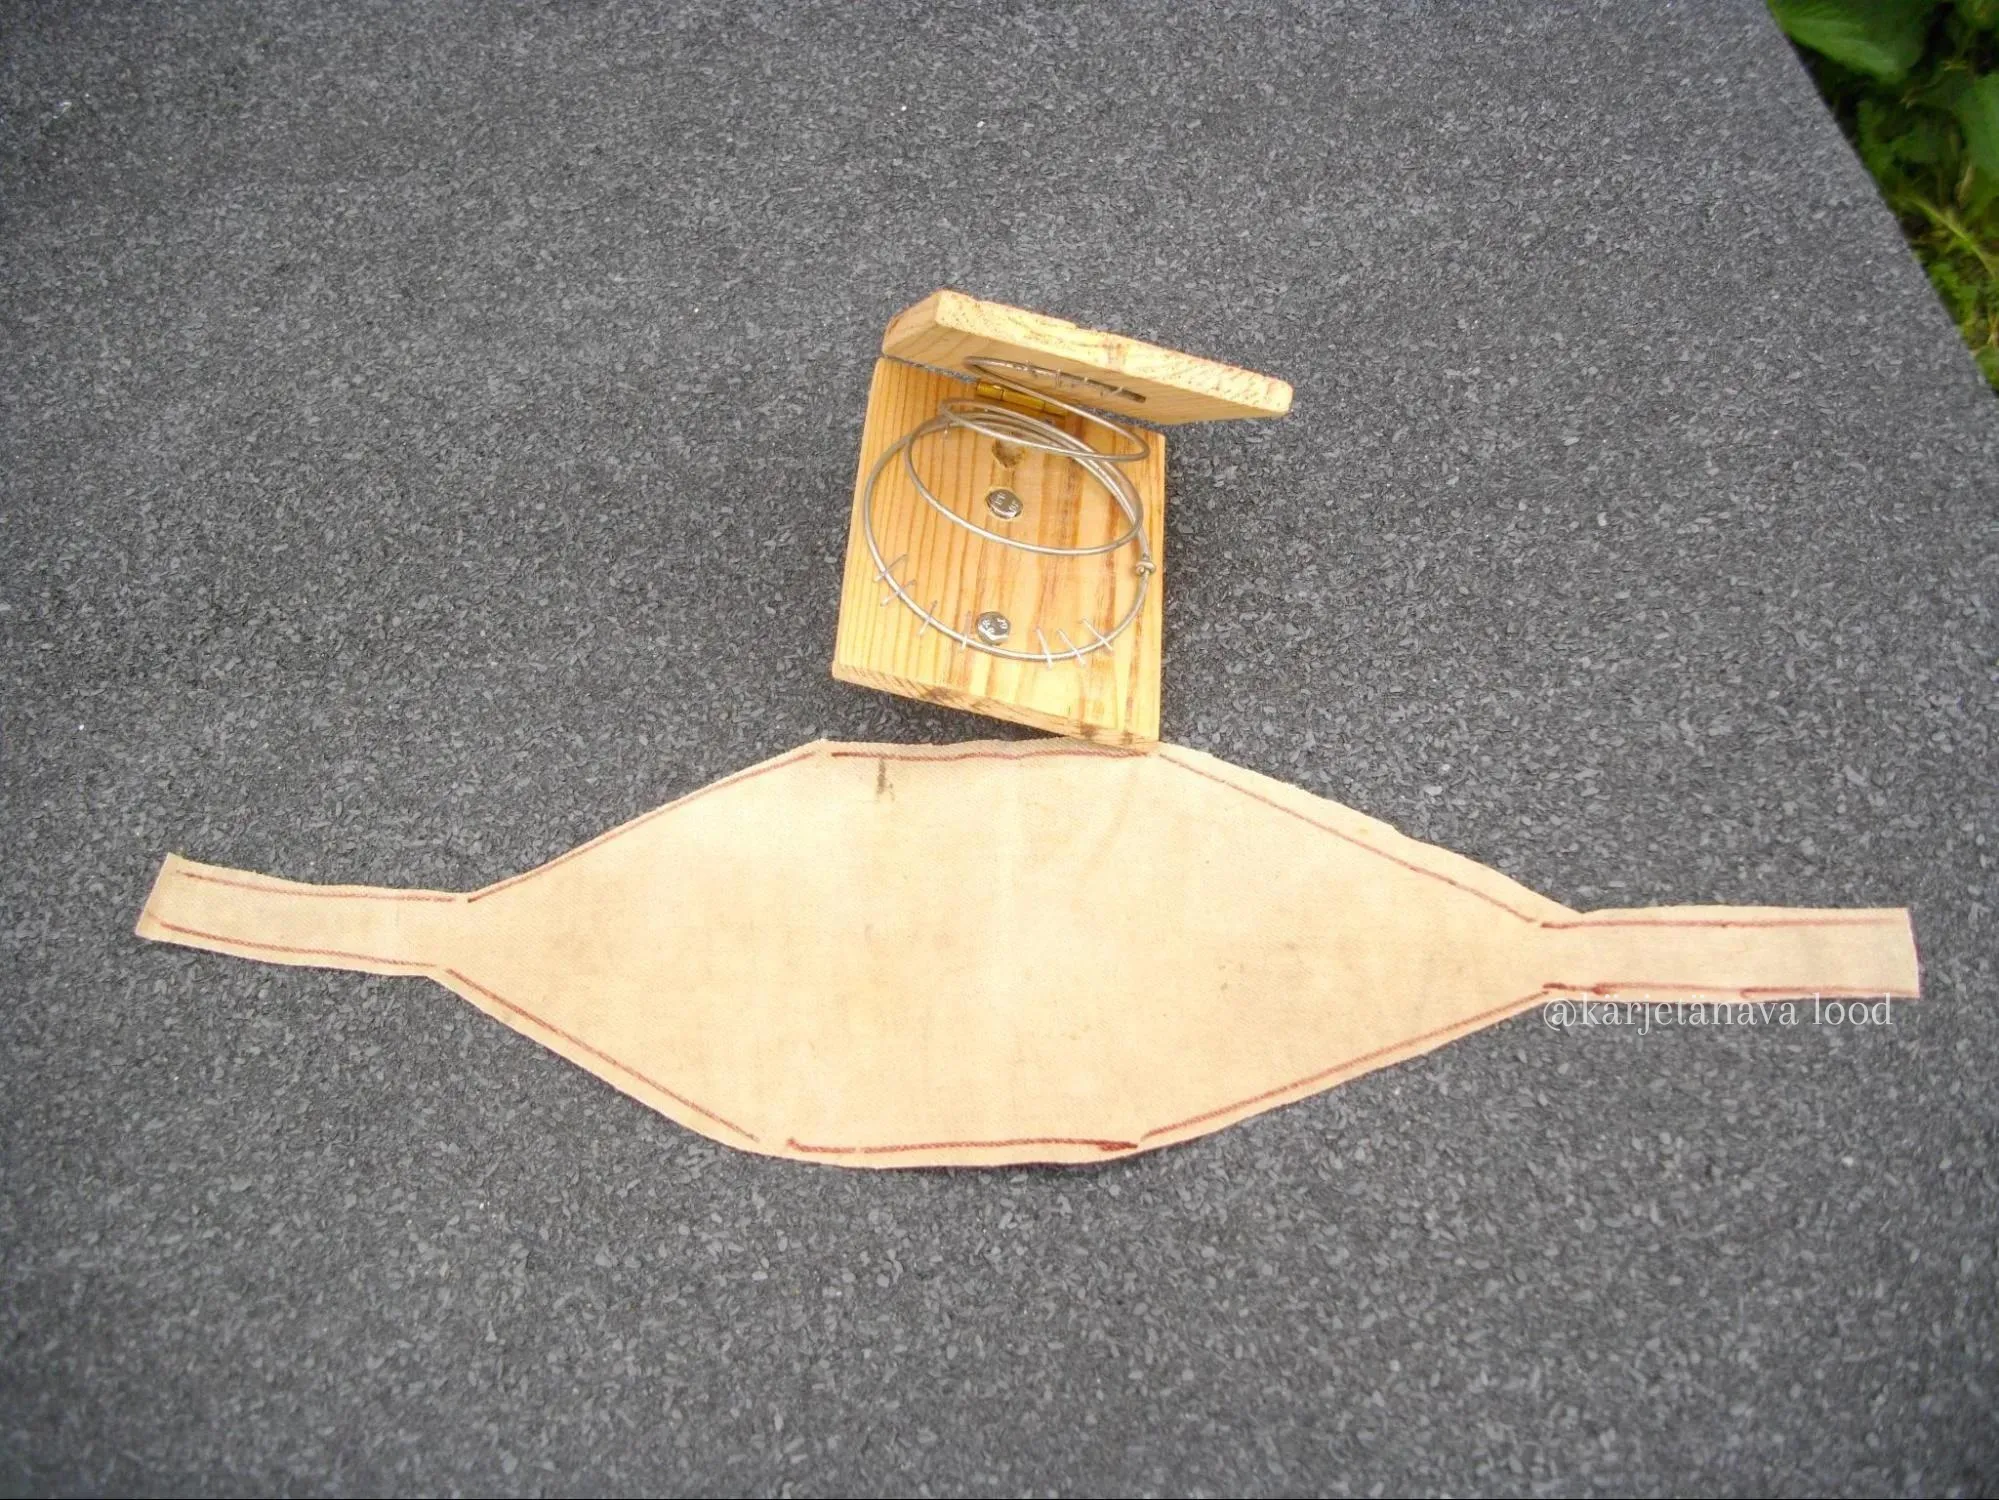
Cutting leather for the smoker's bellows Author: apicrap 03.06.2023 -
Attach the leather to the edges of the bellows boards using a staple gun.
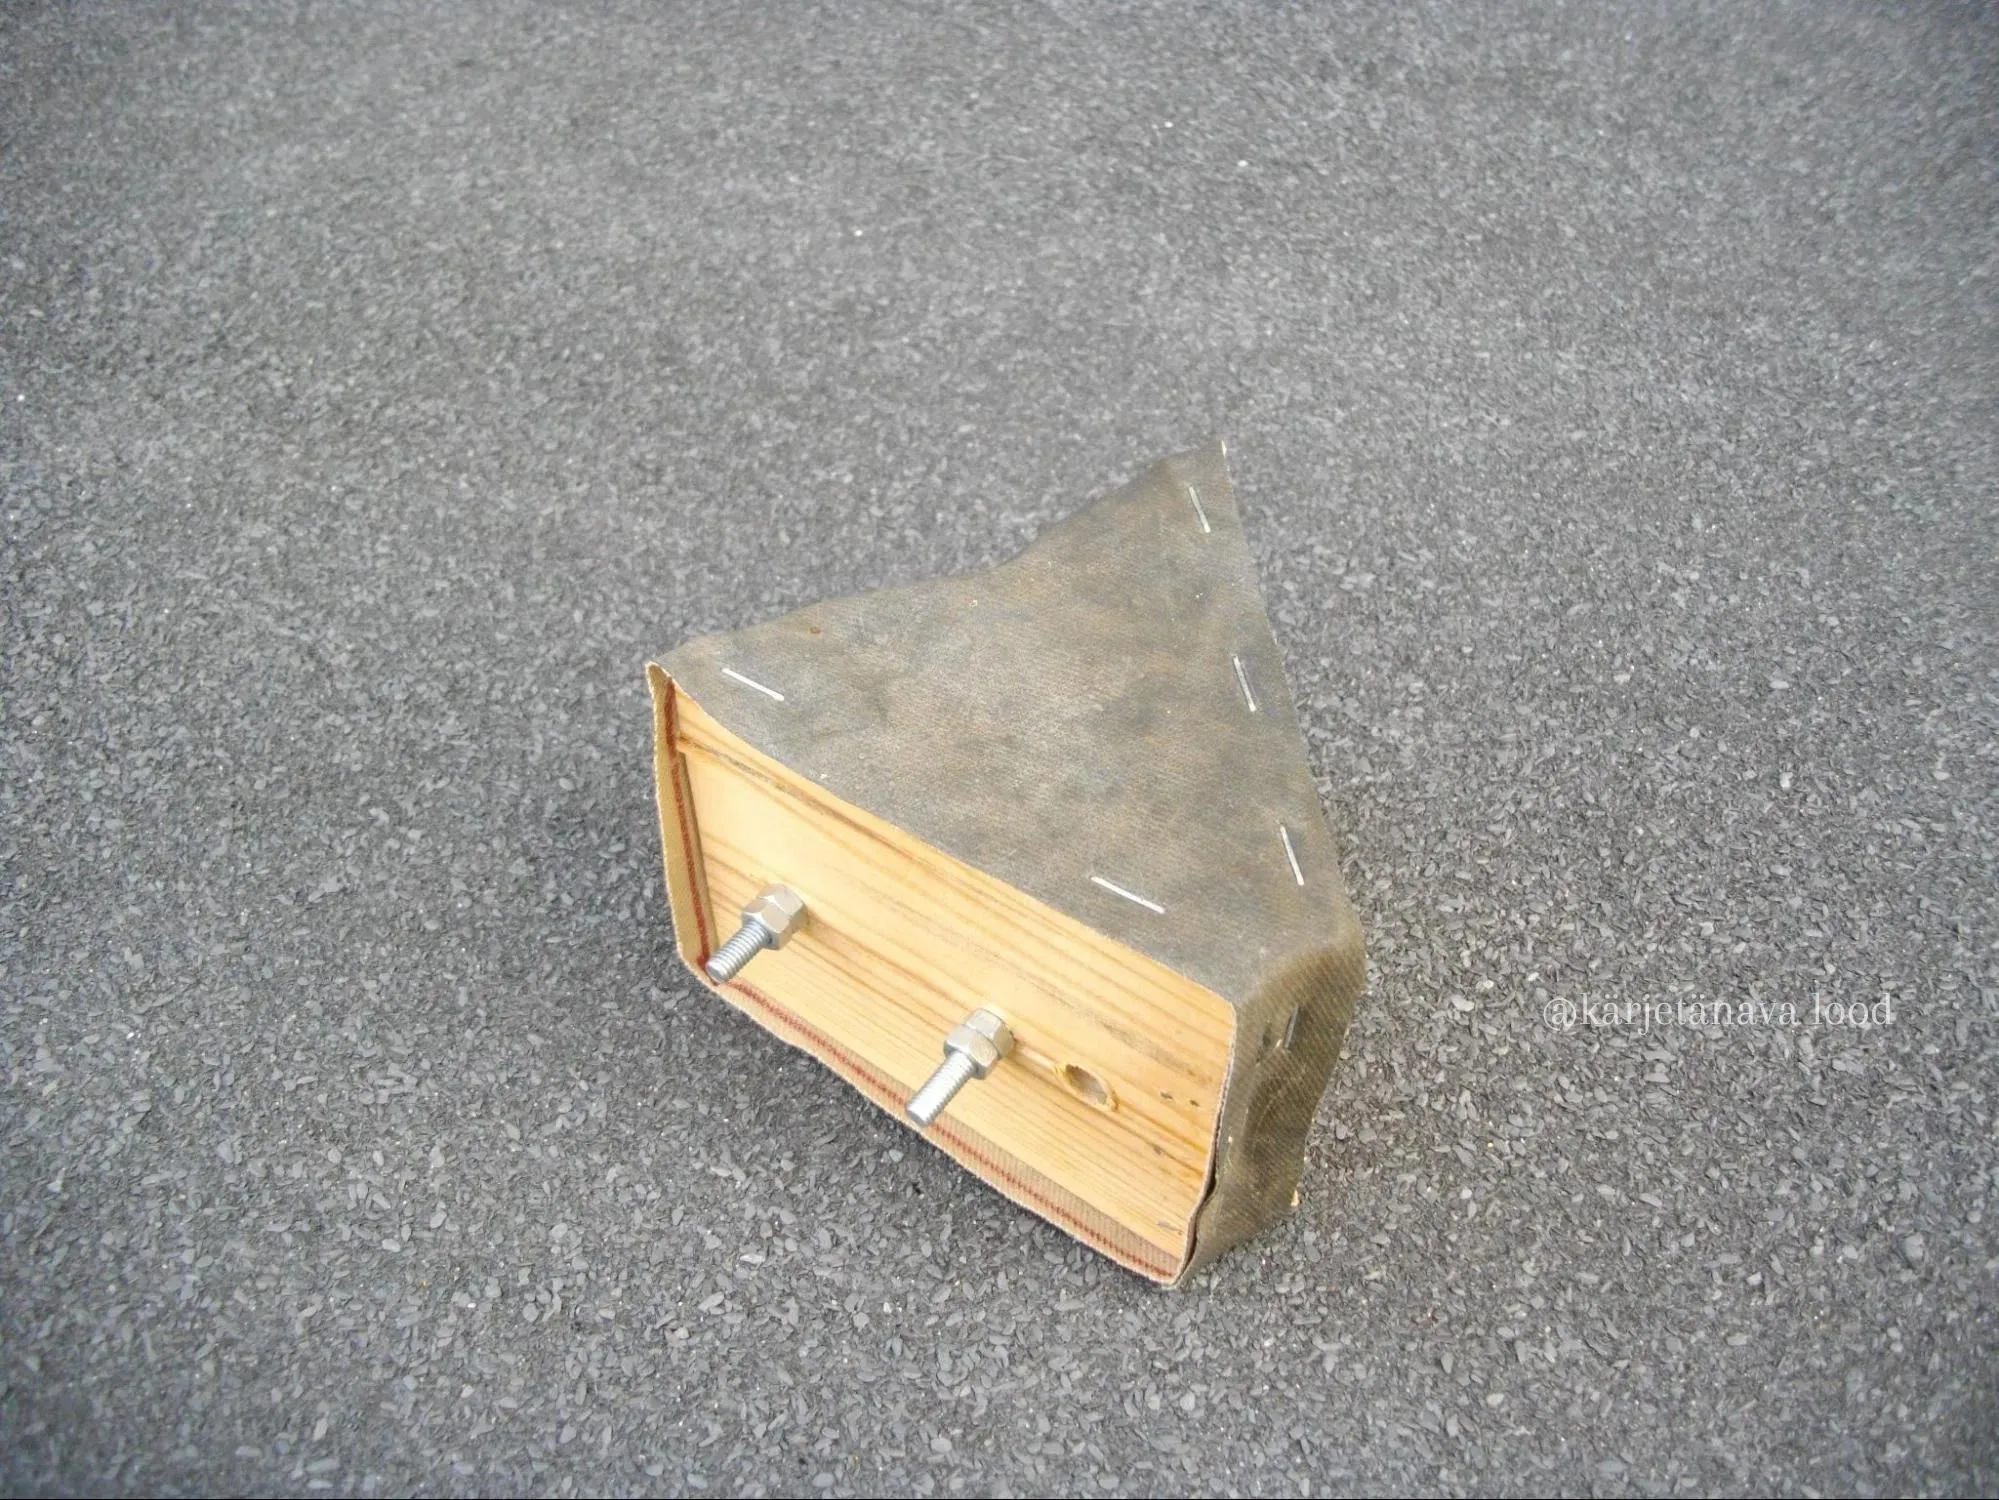
Semi-finished bellows for the smoker Author: apicrap 03.06.2023 -
To minimize air escaping from between the bellows' sides and ensure that all the air from the bellows is directed through the air hole, attach wooden strips to the edges of the bellows. Use small finishing nails to secure the strips.
Creating Smoker’s body
Now, let’s create the smoker’s body.
-
Take the chosen metal container for the smoker's body and drill holes using a metal drill bit that align with the three holes in the bellows.
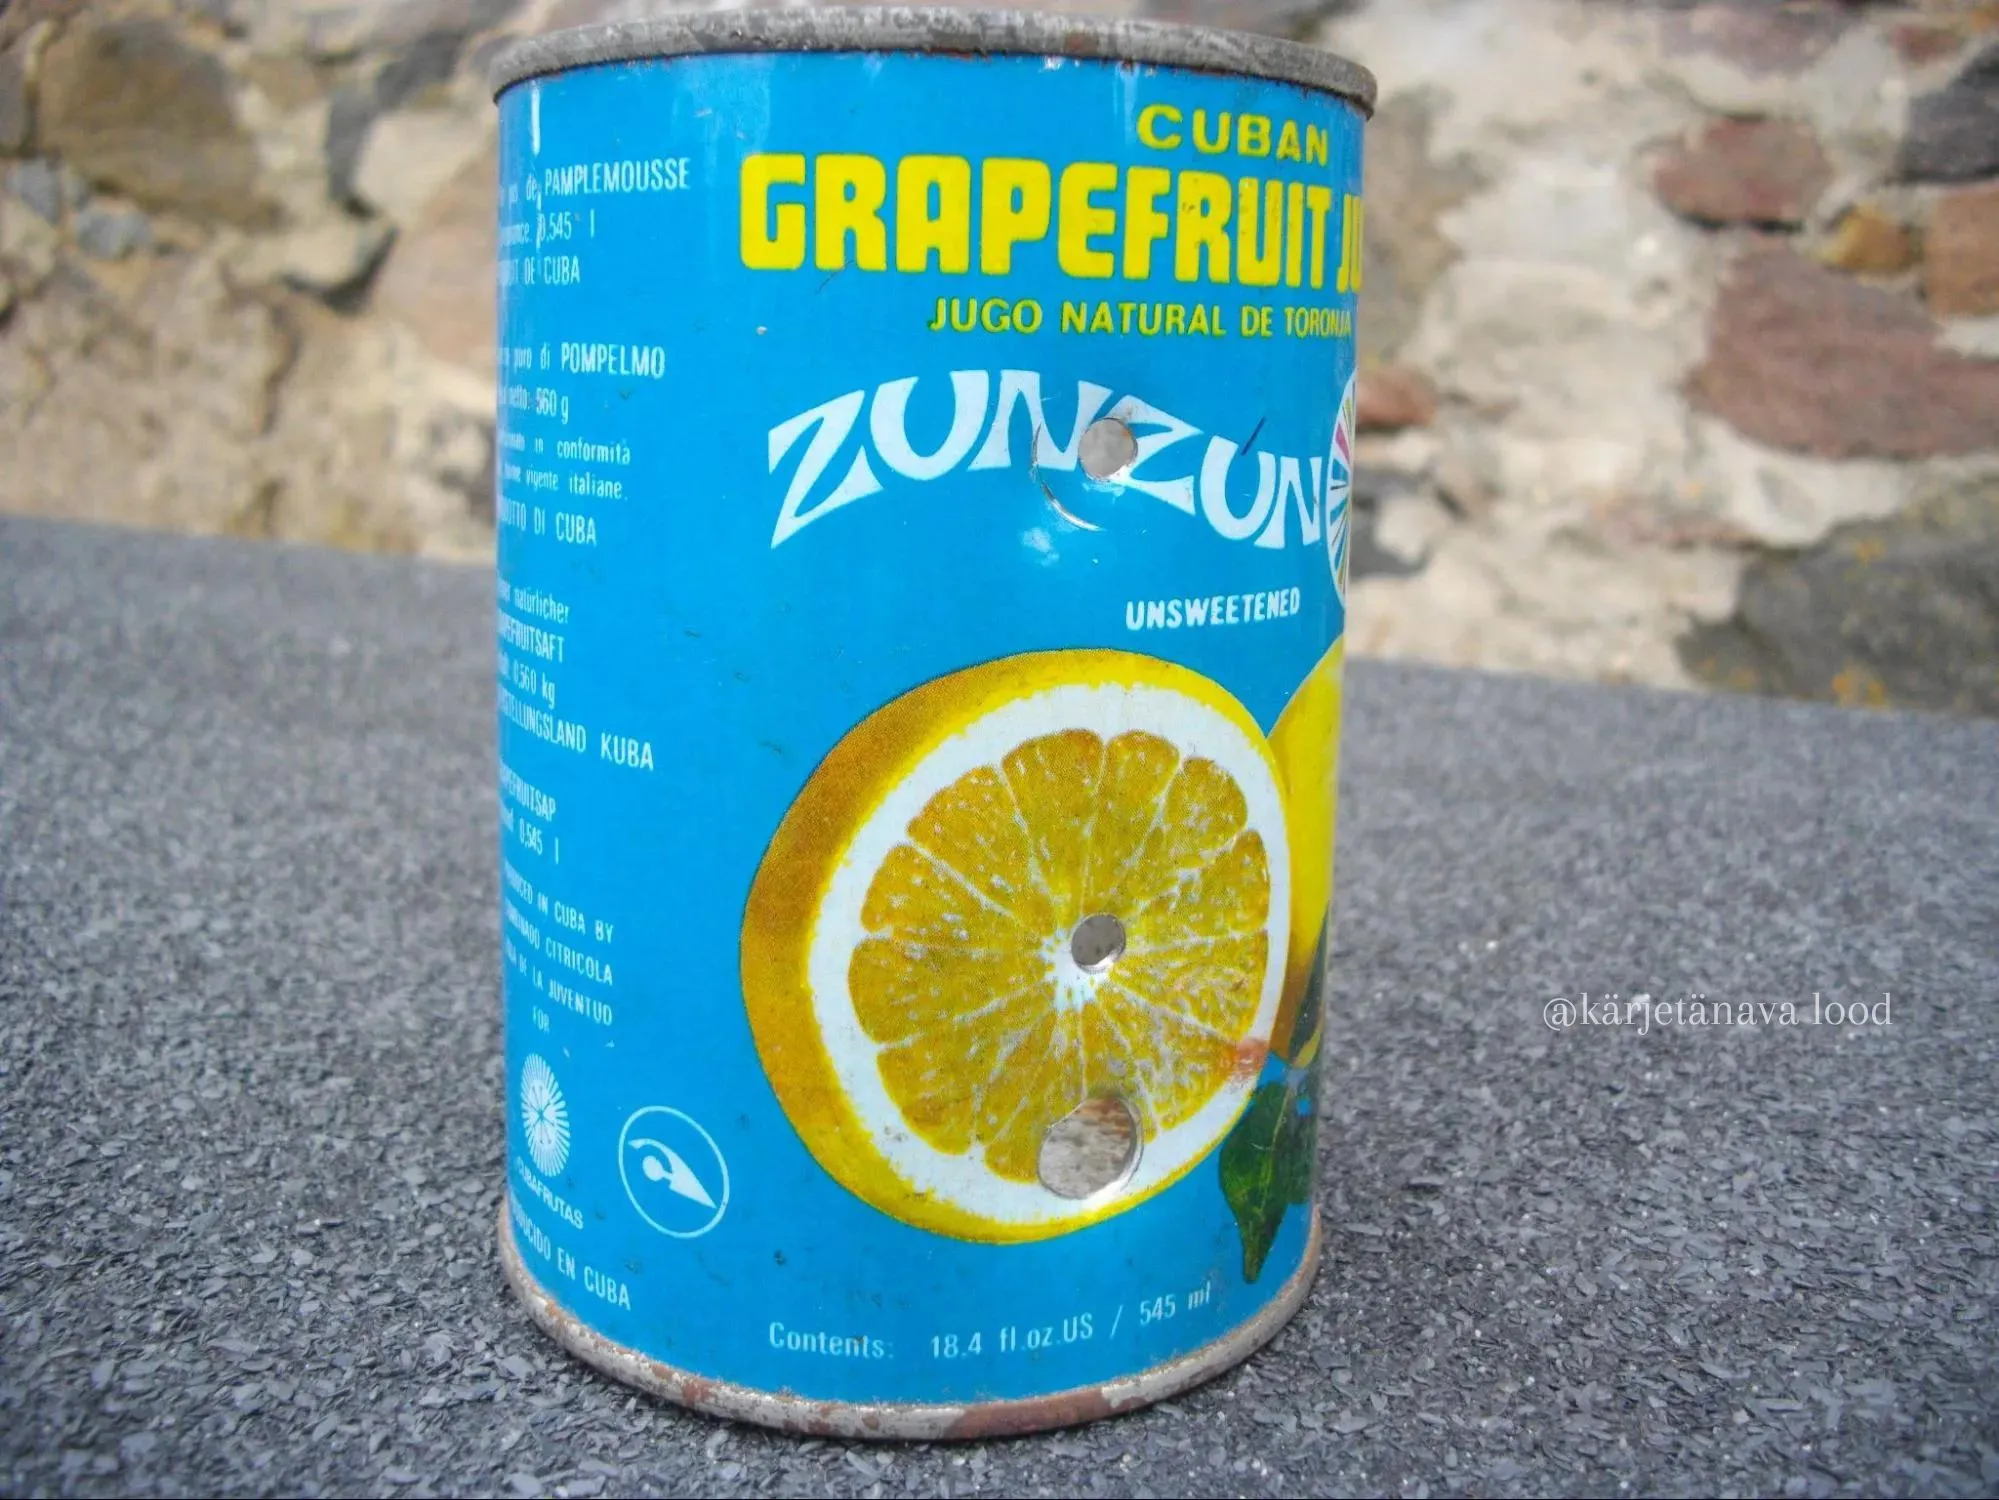
Holes in the body of the smoker Author: apicrap 03.06.2023 -
Take the bellows with attached bolts, place the bolts into the holes of the smoker's body, and secure them from the inside using nuts. Consider the bolt length, making sure the bolts won't obstruct the installation of the later-added sieve in the smoker's bottom.
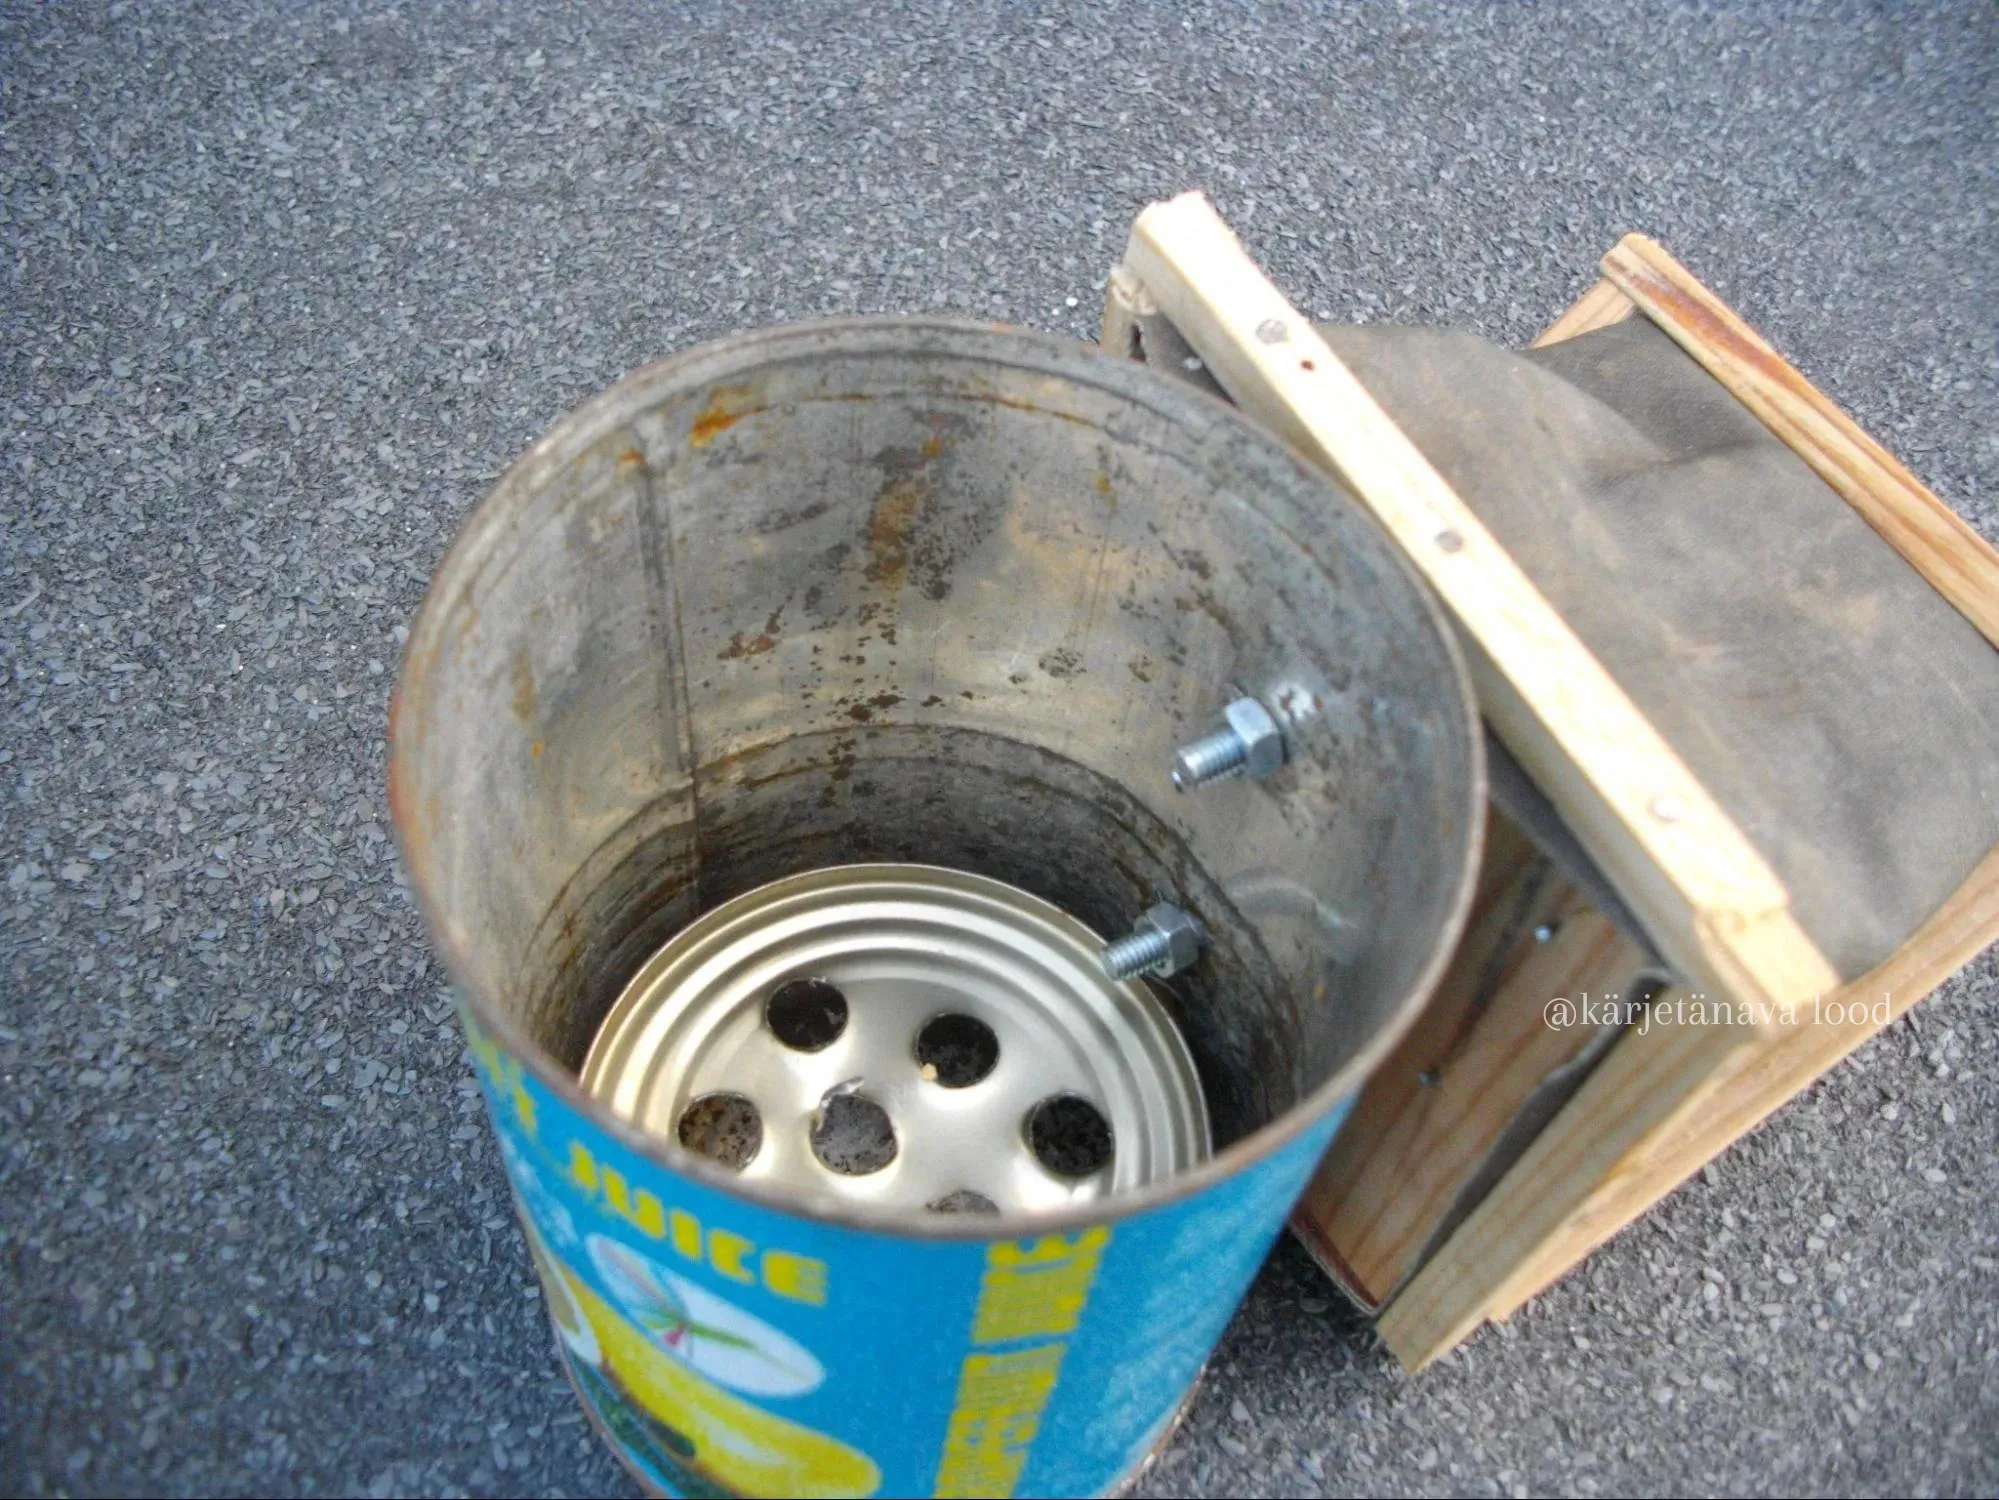
Attaching the bellows to the body of the smoker Author: apicrap 03.06.2023 -
To ensure that air can easily access the fire chamber from below and prevent the air hole from getting clogged, the fire chamber should be slightly higher than the bottom of the smoker. Place a higher sieve on the bottom of the smoker's body, creating a space for the fire. You can use a smaller tin can to make this sieve, ensuring it fits inside the smoker's body. First, drill holes in the base of the tin can, allowing air to pass through to the fire.
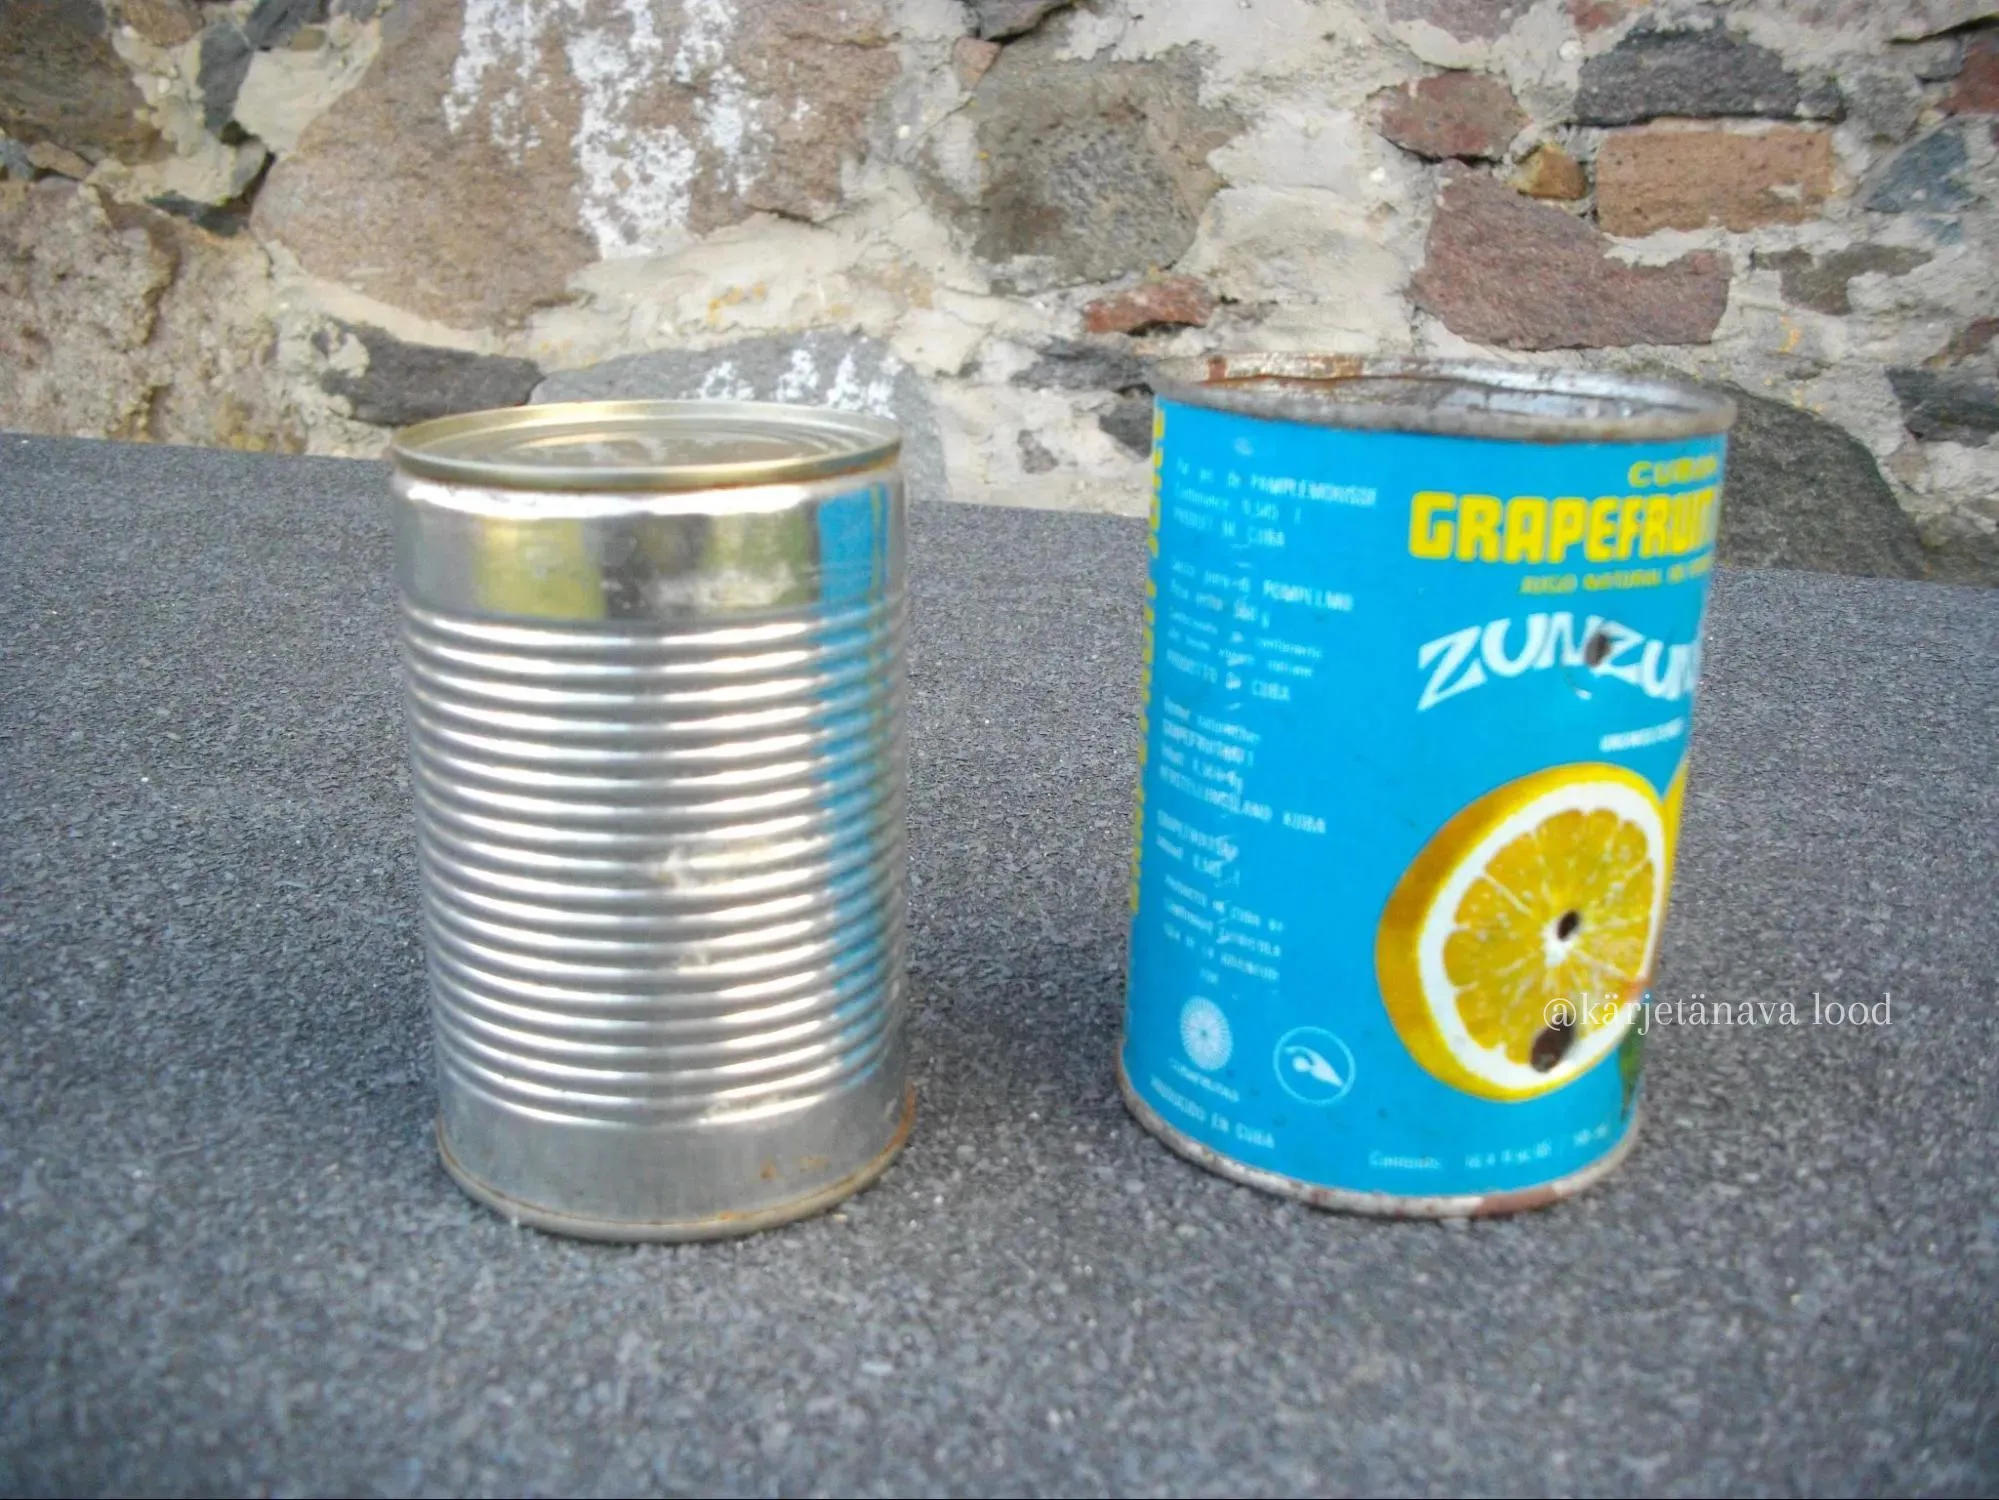
Metal cans for the sieve and body of the smoker Author: apicrap 03.06.2023 - Cut the tin can to the desired height for the sieve using tin snips, ensuring it's slightly taller than the smoker's air hole. Be cautious as the tin edges are sharp. It's recommended to wear gloves to avoid injury while cutting the tin.
-
Cut off the side of the sieve that faces the smoker's air hole. Cutting a curve, as shown in the picture, is the easiest method. Please note that the picture may be a bit misleading - it seems as if the sieve is slightly lower than the smoker's air hole, but in reality, the air hole is beneath the sieve. Additionally, it appears in the image that the bolts' ends inside the smoker may obstruct the sieve, but in practice, there's enough room to easily remove the sieve from the smoker.
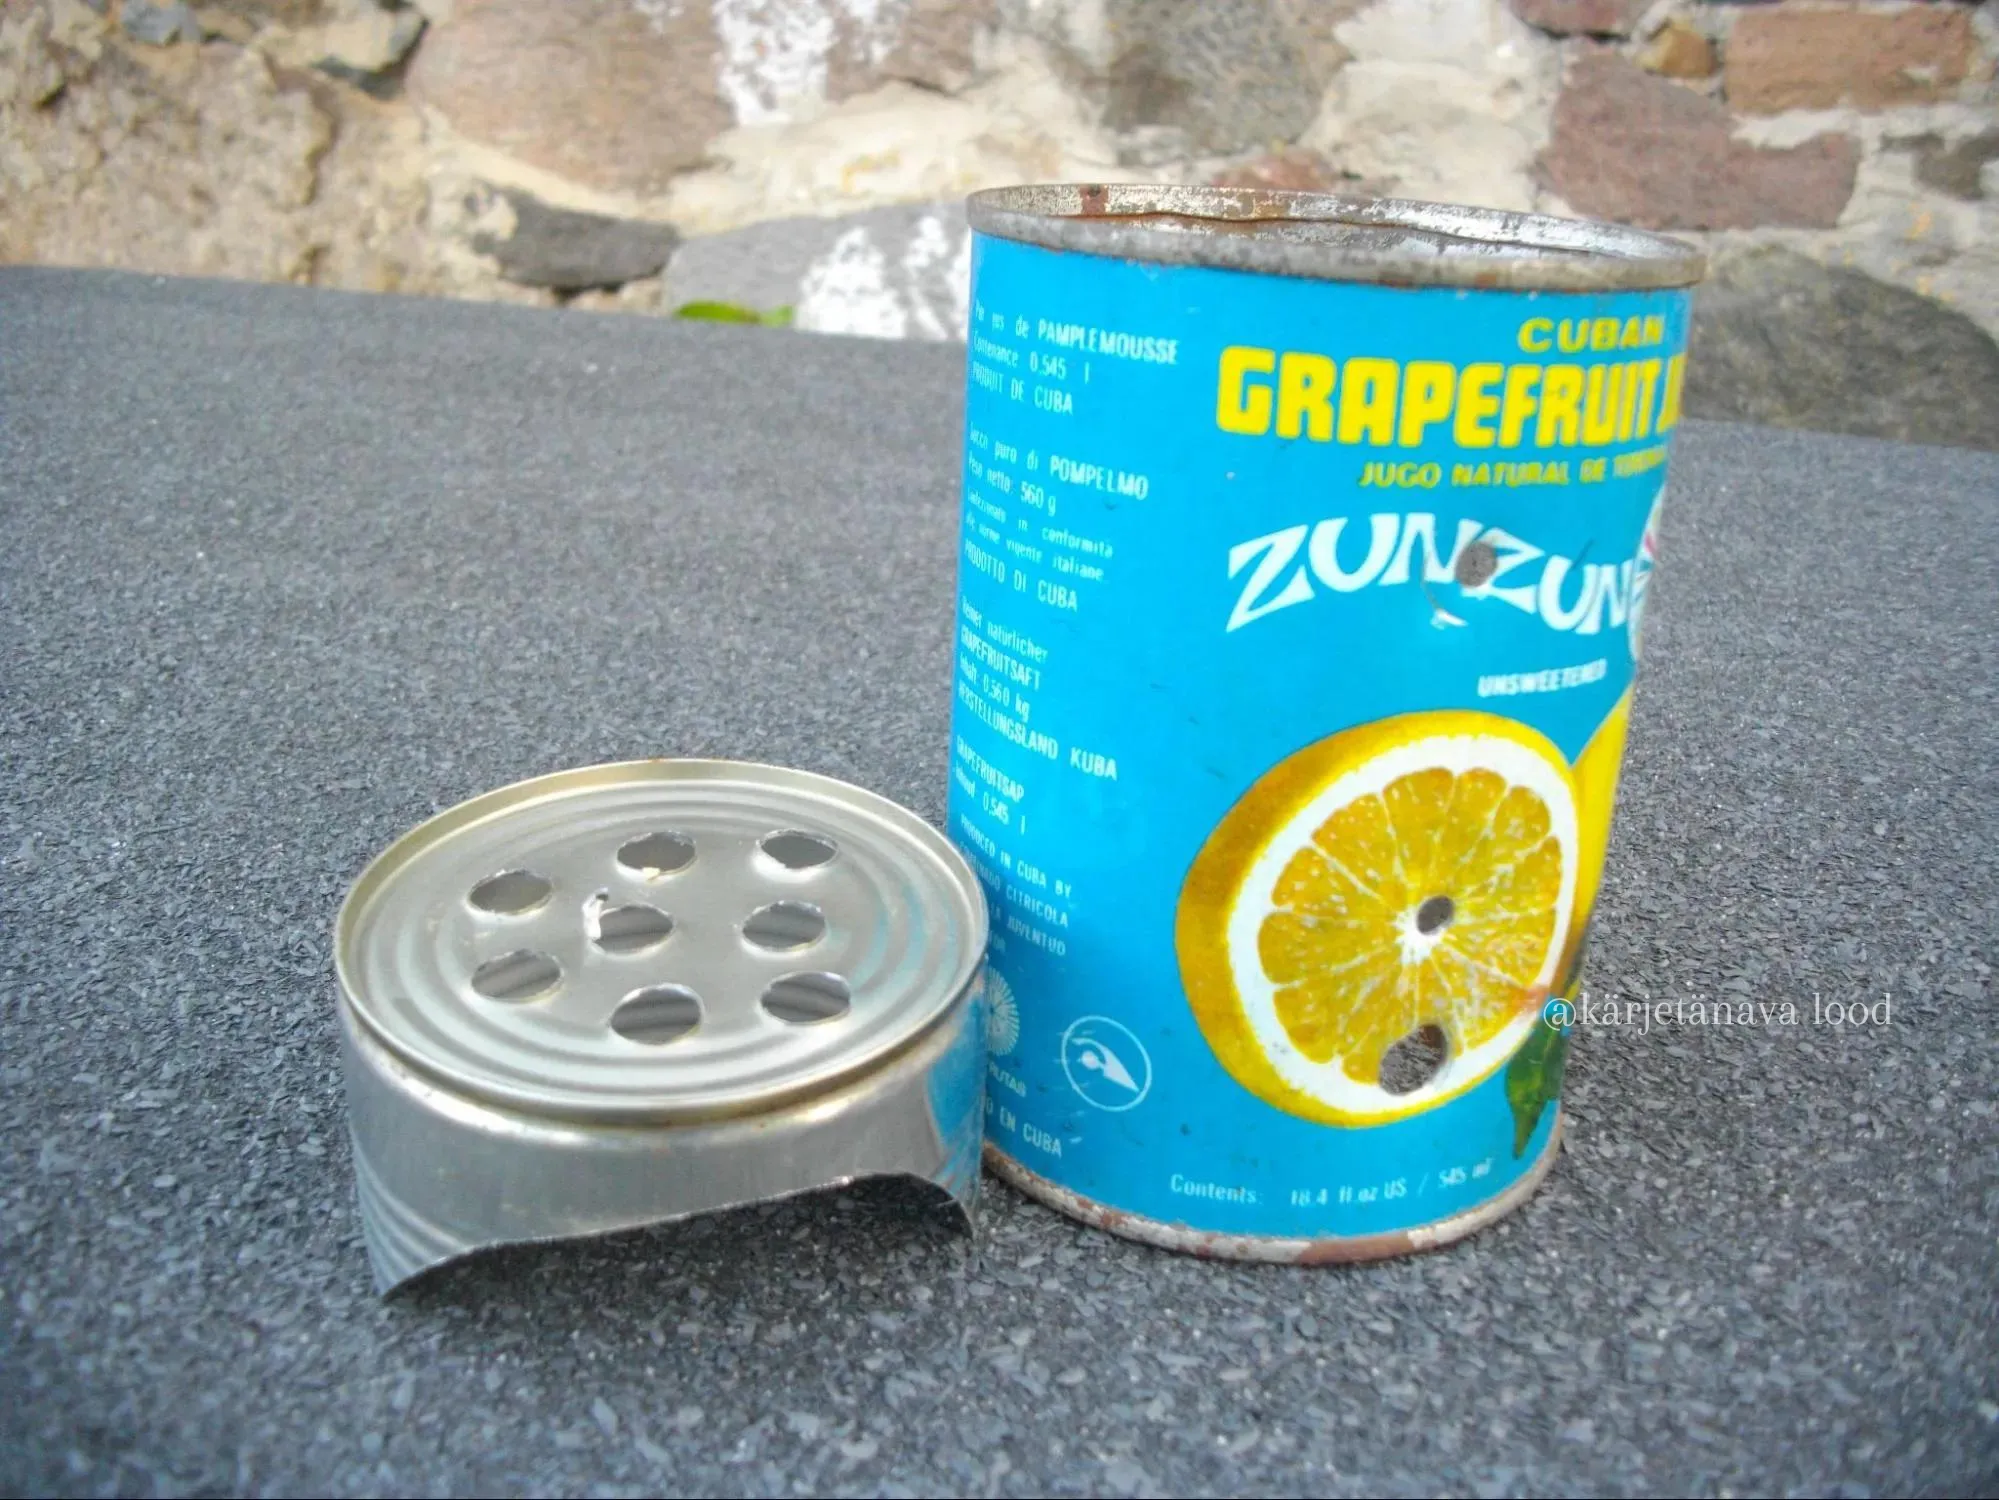
Sieve and body of the smoker Author: apicrap 03.06.2023 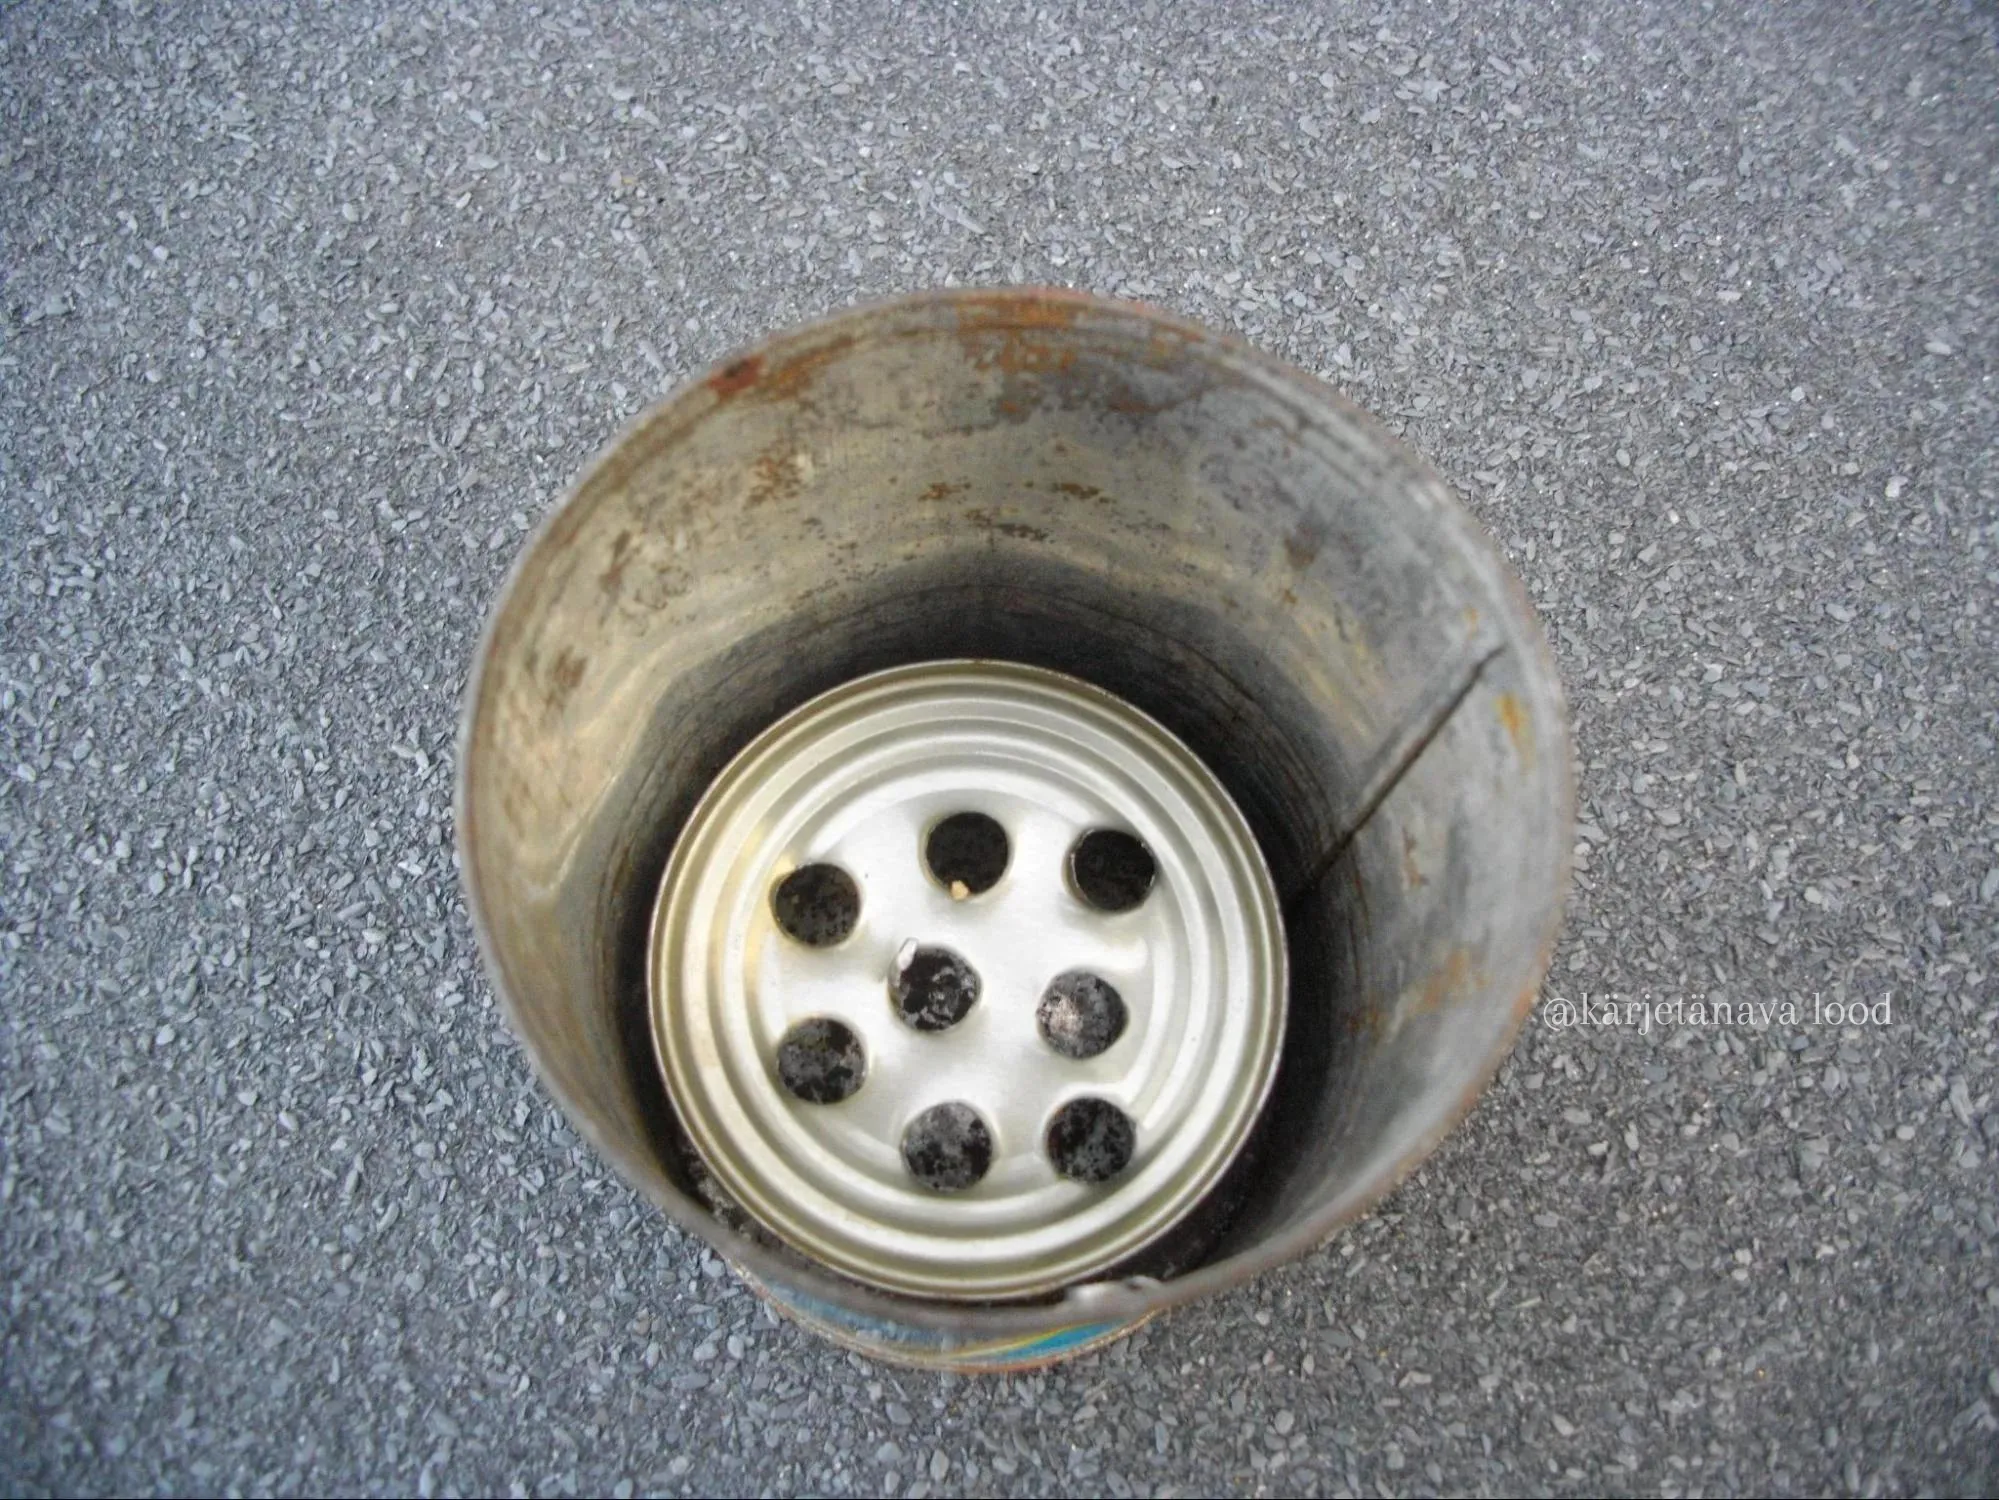
Sieve in the body of the smoker Author: apicrap 03.06.2023 - Finally, create a suitable hole in the lid and attach the nozzle. You can use a paint can lid from a can of non-toxic, water-based paint, flipped over to fit the smoker's lid tightly. Use a suitably sized drill bit or tin snips to create the hole.
-
Attach the smoke conduit to the lid. I used an old brass pipe fitting as the smoke conduit.
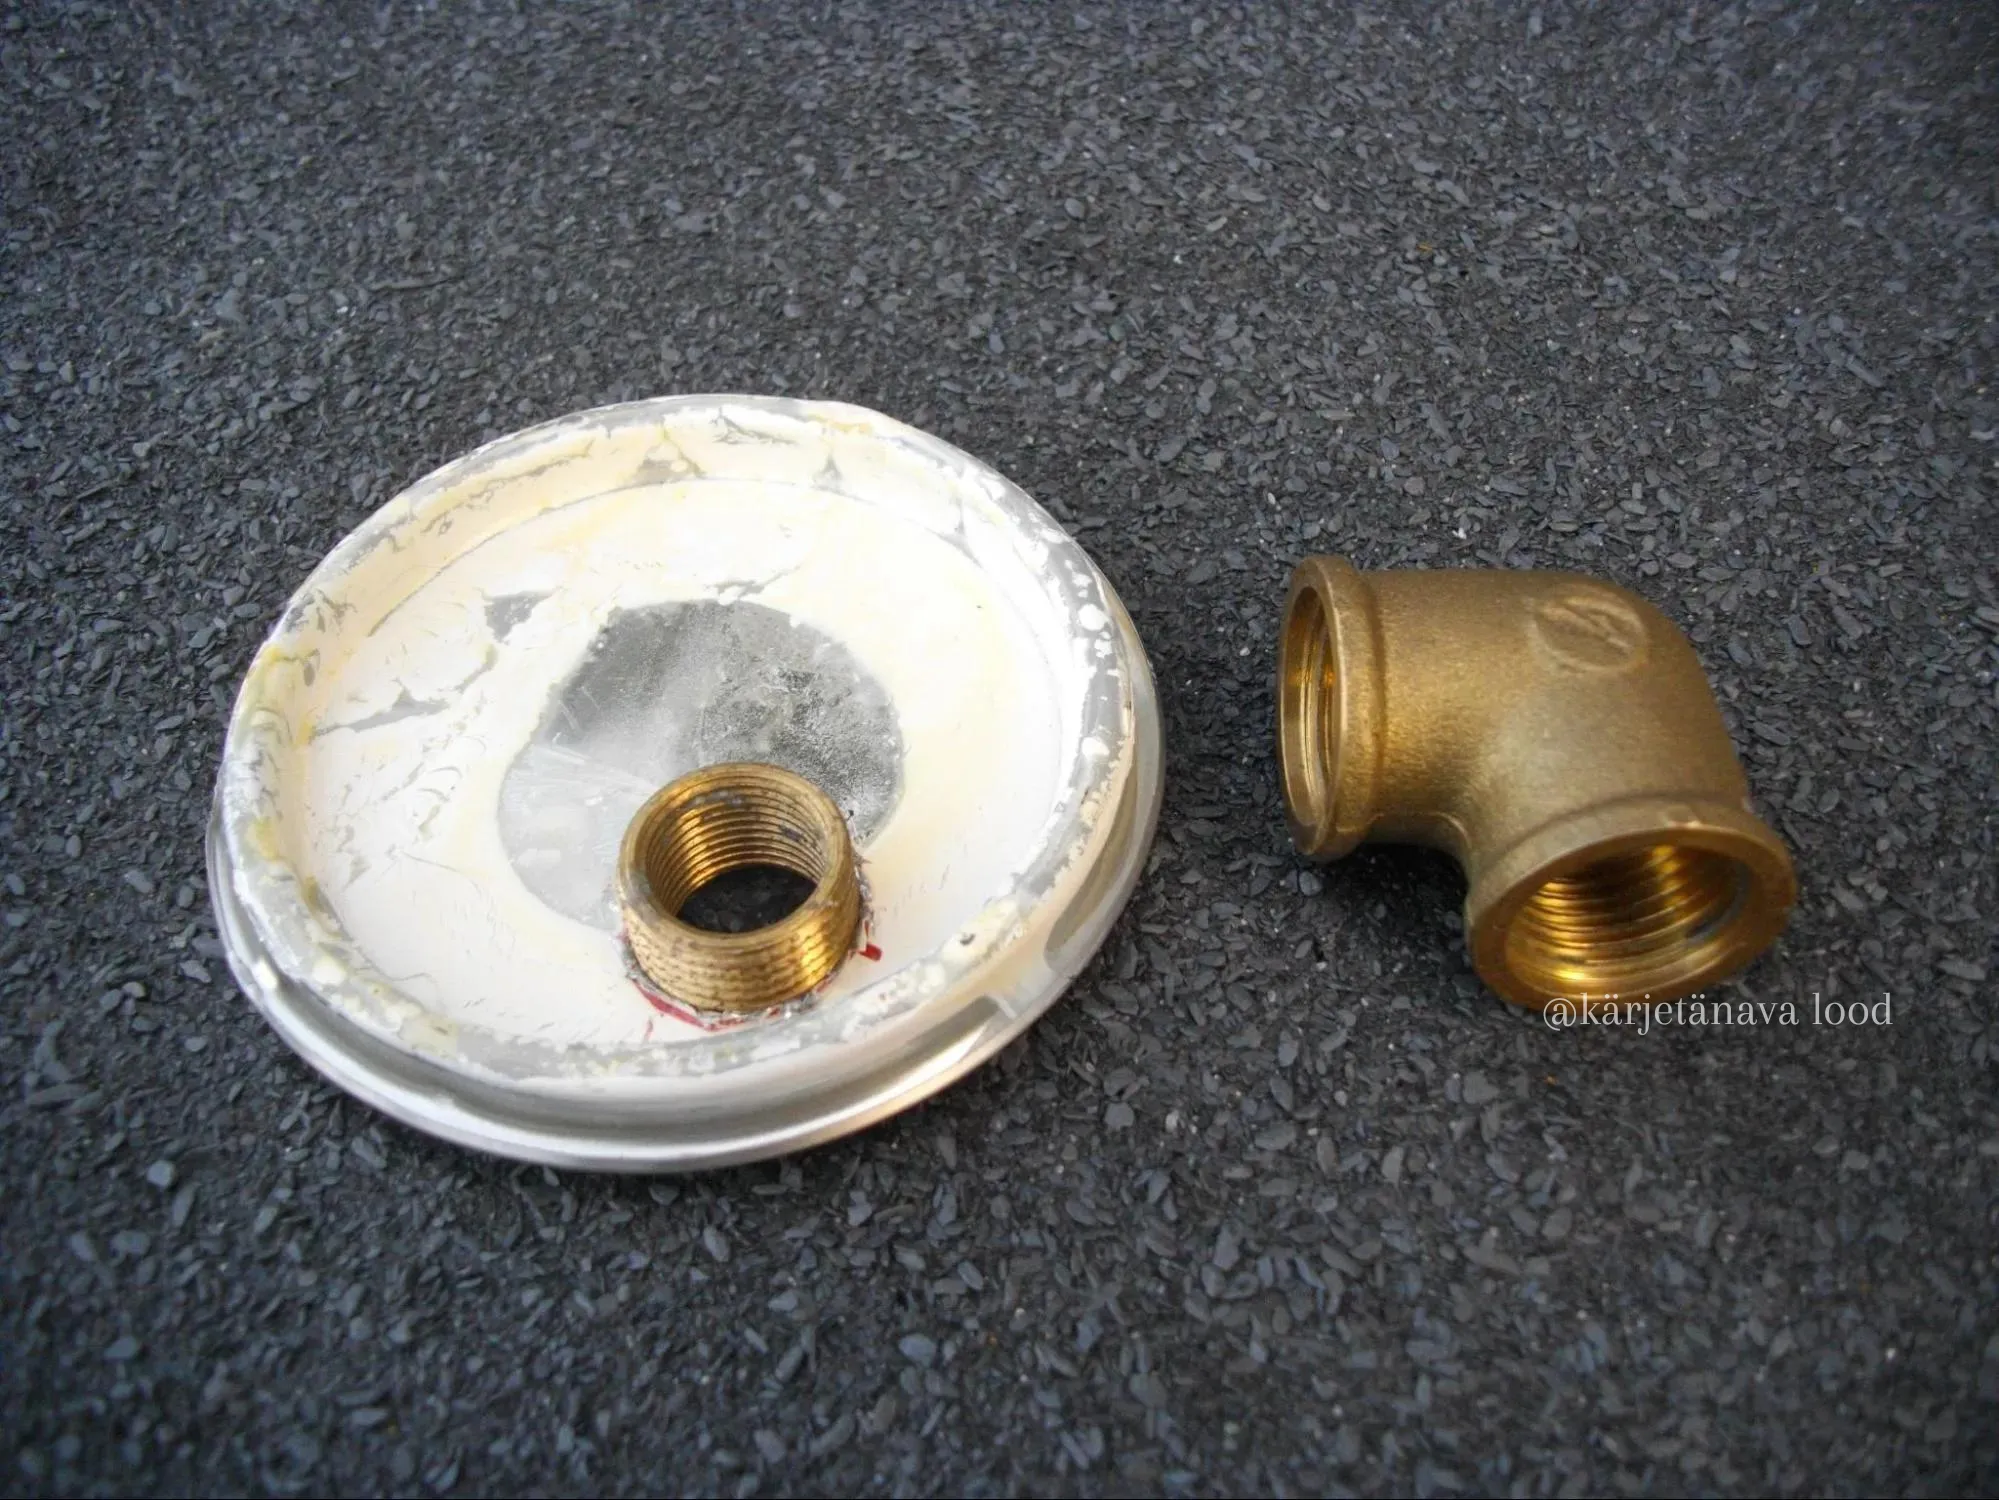
Installing the conduit on the smoker lid Author: apicrap 03.06.2023 -
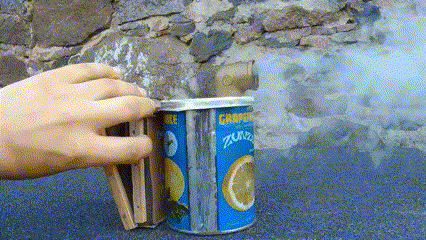
Place the lid with the smoke conduit on top of the smoker's body, and your homemade smoker is ready to use!
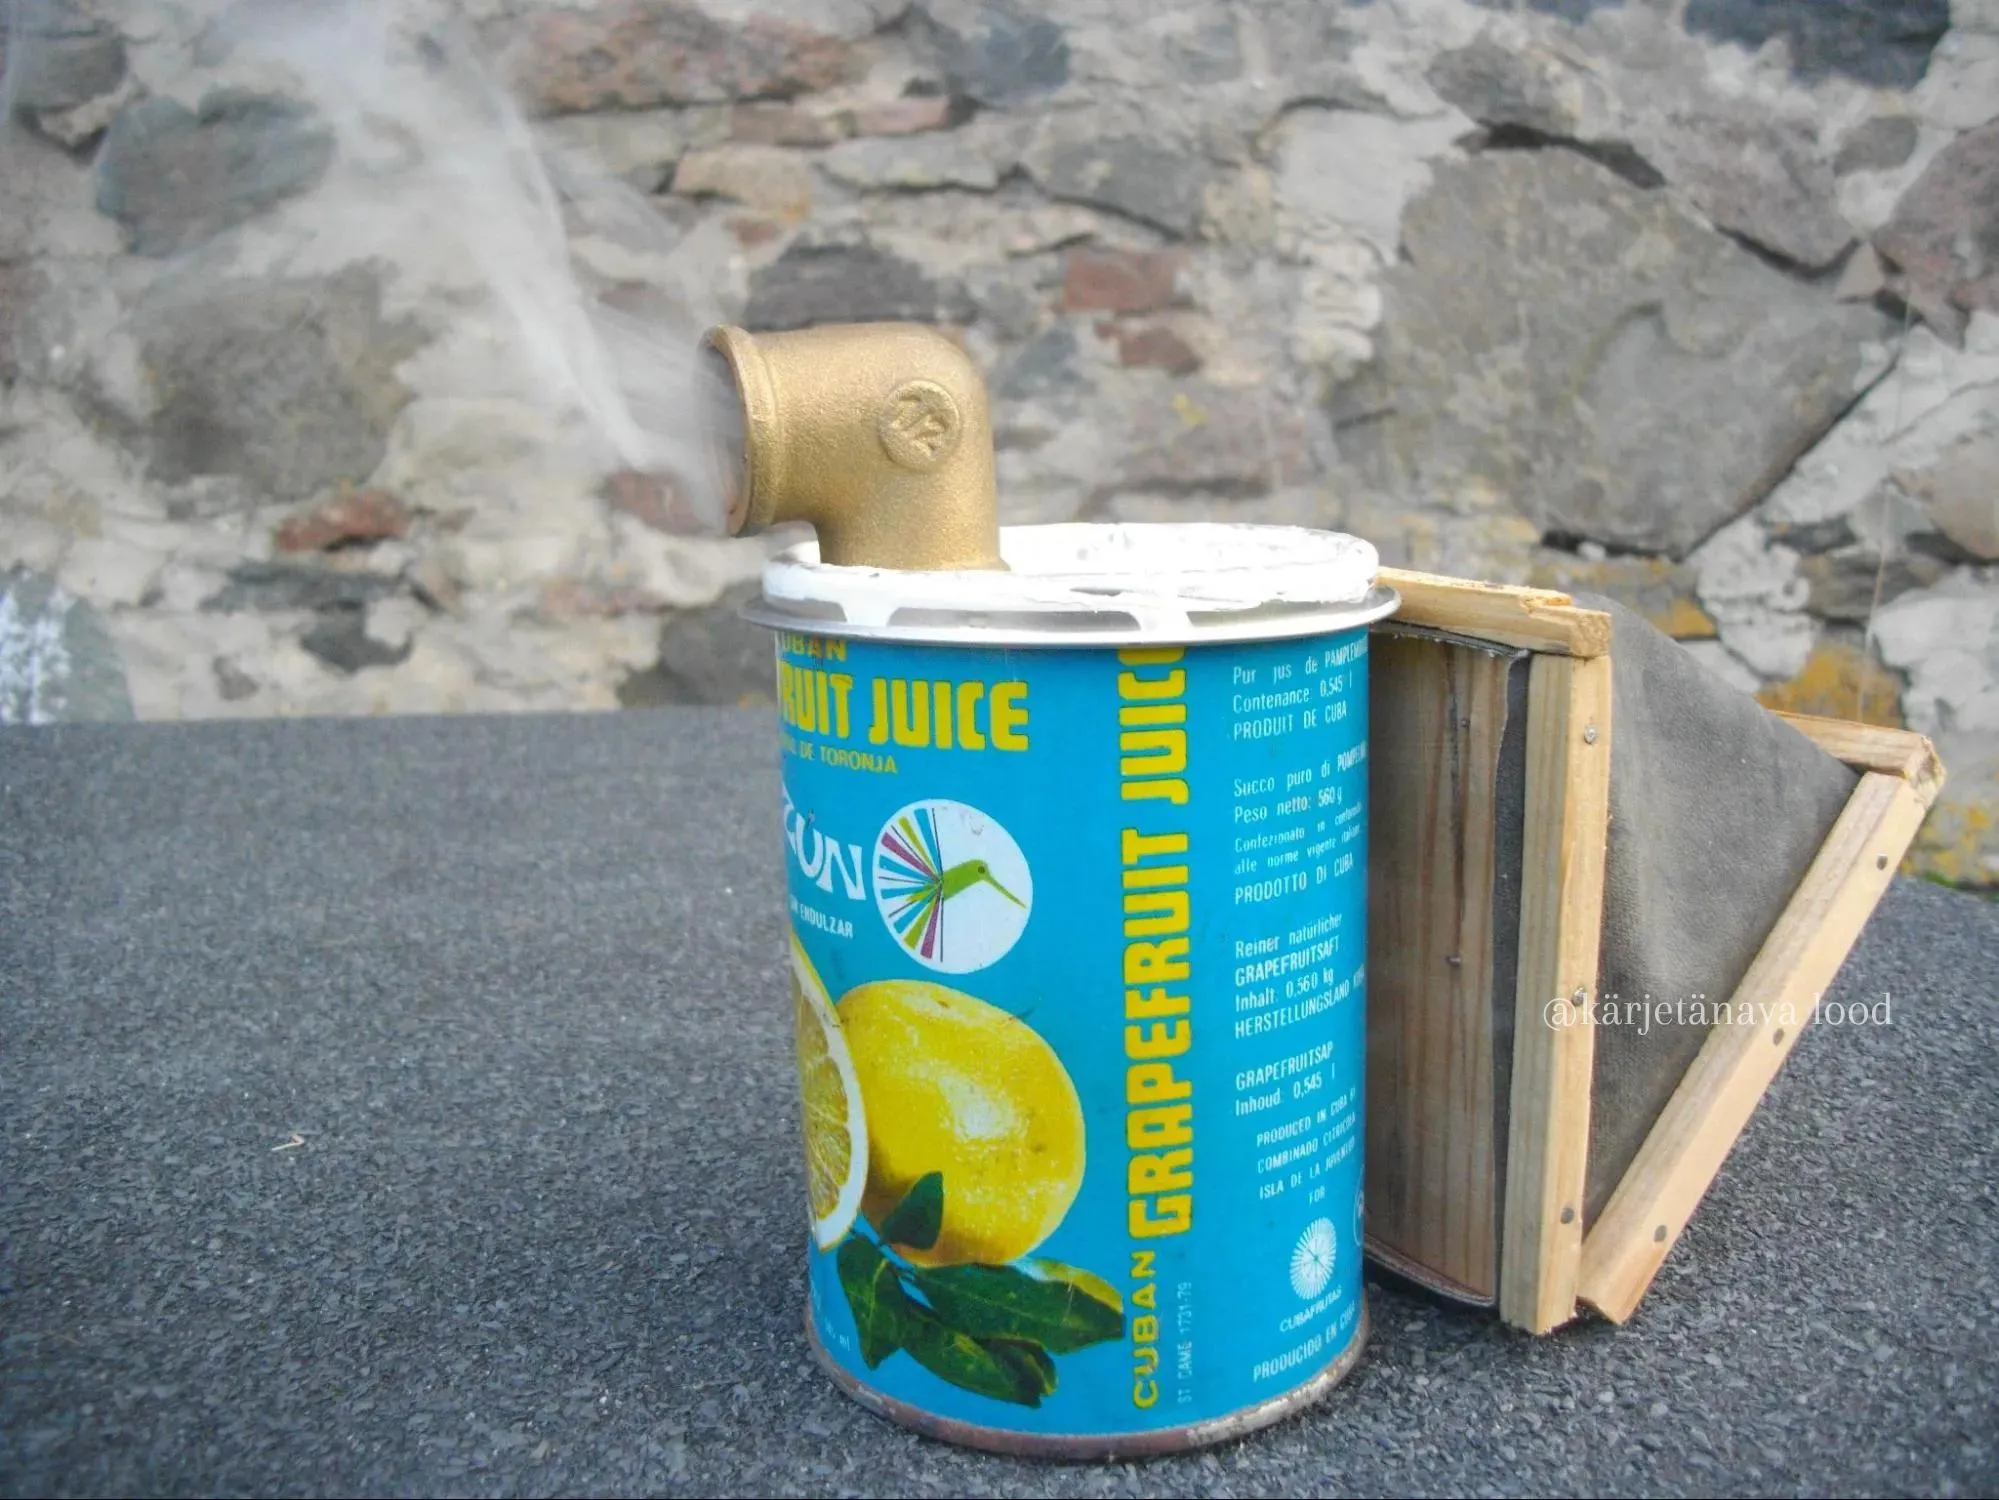
DIY smoker Author: apicrap 03.06.2023
Using the Smoker
For fuel, you can use decayed wood, straw, straw pellets, dry pine needles, or simply dry grass. There’s no definitive rule for the best fuel material; each beekeeper has their preference based on experience. However, the material should be natural, not burn with intense flames, and the resulting smoke should not be hot, as hot smoke could harm the bees. You can test the smoke’s temperature by carefully blowing it onto the back of your hand. A wise beekeeper will first position their hand away from the smoker and gradually move it closer to avoid getting burned. If the smoke feels lukewarm, it’s just right.
It’s a good idea to place damp or fresh grass on top of the fuel in the smoker to prevent sparks and embers from flying out and entering the hive.
Note that you should always light the smoker before wearing your beekeeping suit. There’s a risk of sparks and unexpected flames during lighting, and the mesh on the beekeeper’s suit could catch fire. Only put on the suit once the smoker is lit and you’re confident that no sparks will escape from the smoker’s nozzle.
Happy experimenting!